If you want to:
- Start a blog but don’t know where to start.
- Avoid the black hole of scattered advice on “how to start a blog.”
- Explore what creating a blog from scratch looks like.
- Learn how to write blog posts.
You’re in the right place!

But let’s get one thing out of the way first: If you’re holding back on blogging because you had to Google “what is WordPress,” relax — you can create a blog with even the most basic knowledge.
In under 20 minutes, this step-by-step guide will show you how to start a blog using WordPress.
You’ll find actionable strategies to start blogging from the ground up, tips from expert bloggers, and the technicalities behind the scenes — simplified.
Let’s start blogging!
What Is a Blog?
Blog
A blog is a type of website that publishes ‘blog posts’ or web articles regularly. These entries are usually presented in reverse chronological order.
Read MoreA blog is a digital space where individuals, businesses, and others share their thoughts, experiences, or information regularly. It can be used for marketing, as a personal outlet, or as a professional portfolio.
Each blog post is part of your overall blog. Think of it like a chapter in a book.
Whether you’re a hobbyist, a budding writer, or want to expand marketing efforts for your brand, 83% of internet users say they read blogs at least once a month. That’s a pretty big audience!
Plus, 82% of bloggers report seeing at least “some results” from their blogs. This could be inbound leads, conversions, or simply the number of people who enjoy reading what you have to say.
What Are the Benefits of Starting a Blog?
If you’re here, you’re probably convinced of the benefits of blogging. Nonetheless, let’s quickly cover the key advantages:
- Make money blogging: Blogging can help you bring in income, whether you’re working on an existing business or starting a new one. You can earn anywhere from $500–$2,000 per month within your first year of blogging. You’ve got to be consistent, though.
- Get better at digital marketing: As of 2023, digital marketing is one of the most in-demand skills. It’s been proven that marketers who prioritize blogging efforts are 13x more likely to see a positive return on investment (ROI). That’s a big deal!
- Find your community: A personal or company blog page is an excellent way to meet people with similar interests. As a blogger, you can establish relationships with other writers and content creators. For brands, it lets you build connections with your online audience.
- Have a creative outlet: Got a favorite TV series that was canceled? Think Vancouver is the prettiest place on Earth? Whatever it is, write it down! A blog is a great outlet for self-expression and a terrific emotional release.
Alright. With that background out of the way, let’s get down to business.
How To Start a Blog in 11 Easy Steps
Here’s everything you need to know to start a profitable blog in 2024.
1. Pick Your Blog Niche
A blog niche is the specific topic your blog focuses on. Think of it as choosing a lane on a busy highway — your very own corner of the internet. All of the blog content you create will be unified by this theme.
Basically, instead of writing about everything under the sun, you concentrate on a particular topic.
For example:
- Instead of “fitness,” you might want to create a blog about yoga for beginners.
- Instead of “technology,” focus on smartphone photography tips.
- Instead of “travel,” perhaps you need to start with budget backpacking in Europe.
When you’re looking to start a blog, how do you pick your niche?
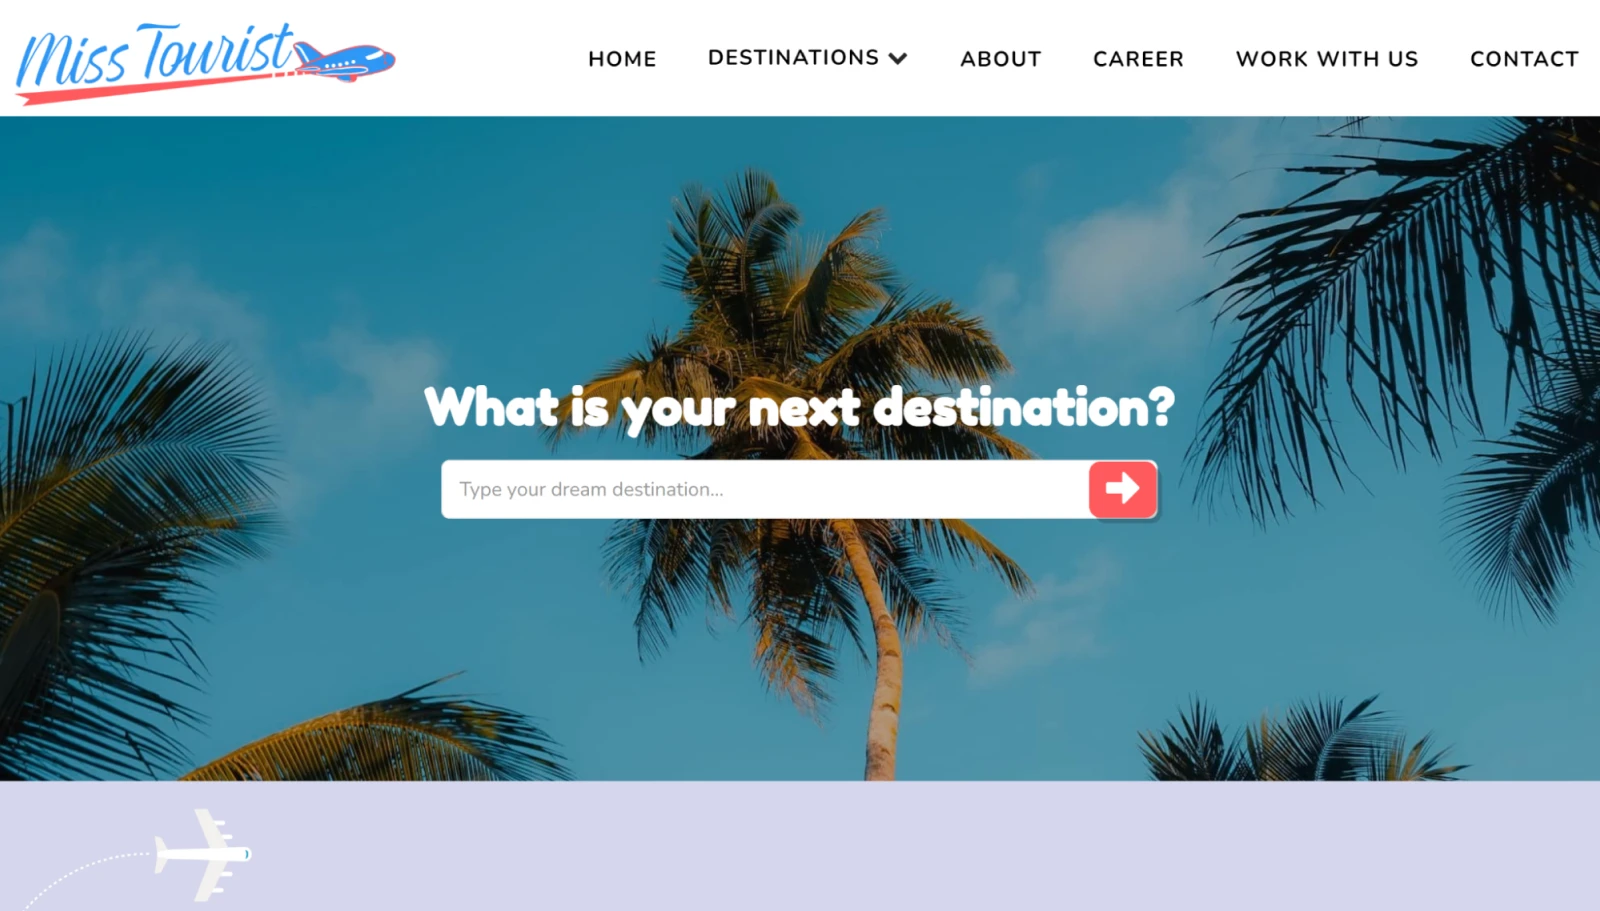
Yulia Saf runs misstourist.com, a successful travel blog that attracts 400,000 visitors a month. According to her, “niche selection is critical,” and the “magic lies where passion and skills intersect.”
She says, “For beginners, I’d say, start at the intersection of your interest and expertise.”
Niche selection is critical.
So, think about two things:
- What are you most passionate about?
- What are you good at?
2. Choose Your Blog Name
“What’s in a name,” you say? A lot, actually. When you define your niche, you can choose a name for your blog that grows with you. A blog name can help readers identify with your content, learn to associate it with your brand, and make your digital space more memorable.
As you consistently blog and get traction, you can then think about starting to make money.
Most blog names can be separated into two categories:
- Keyword-based: These are names that contain relevant keywords to describe the blog’s purpose or theme. Some examples include British Beauty Blogger and Car and Driver.
- Brand-based: These blog names focus on a brand and are usually shorter and more memorable. A few examples are Kotaku and BMWBLOG.
If you feel stuck and need inspiration, try an online name generator. These provide potential names based on a word or phrase. One of our favorite tools is Blog Name Generator:
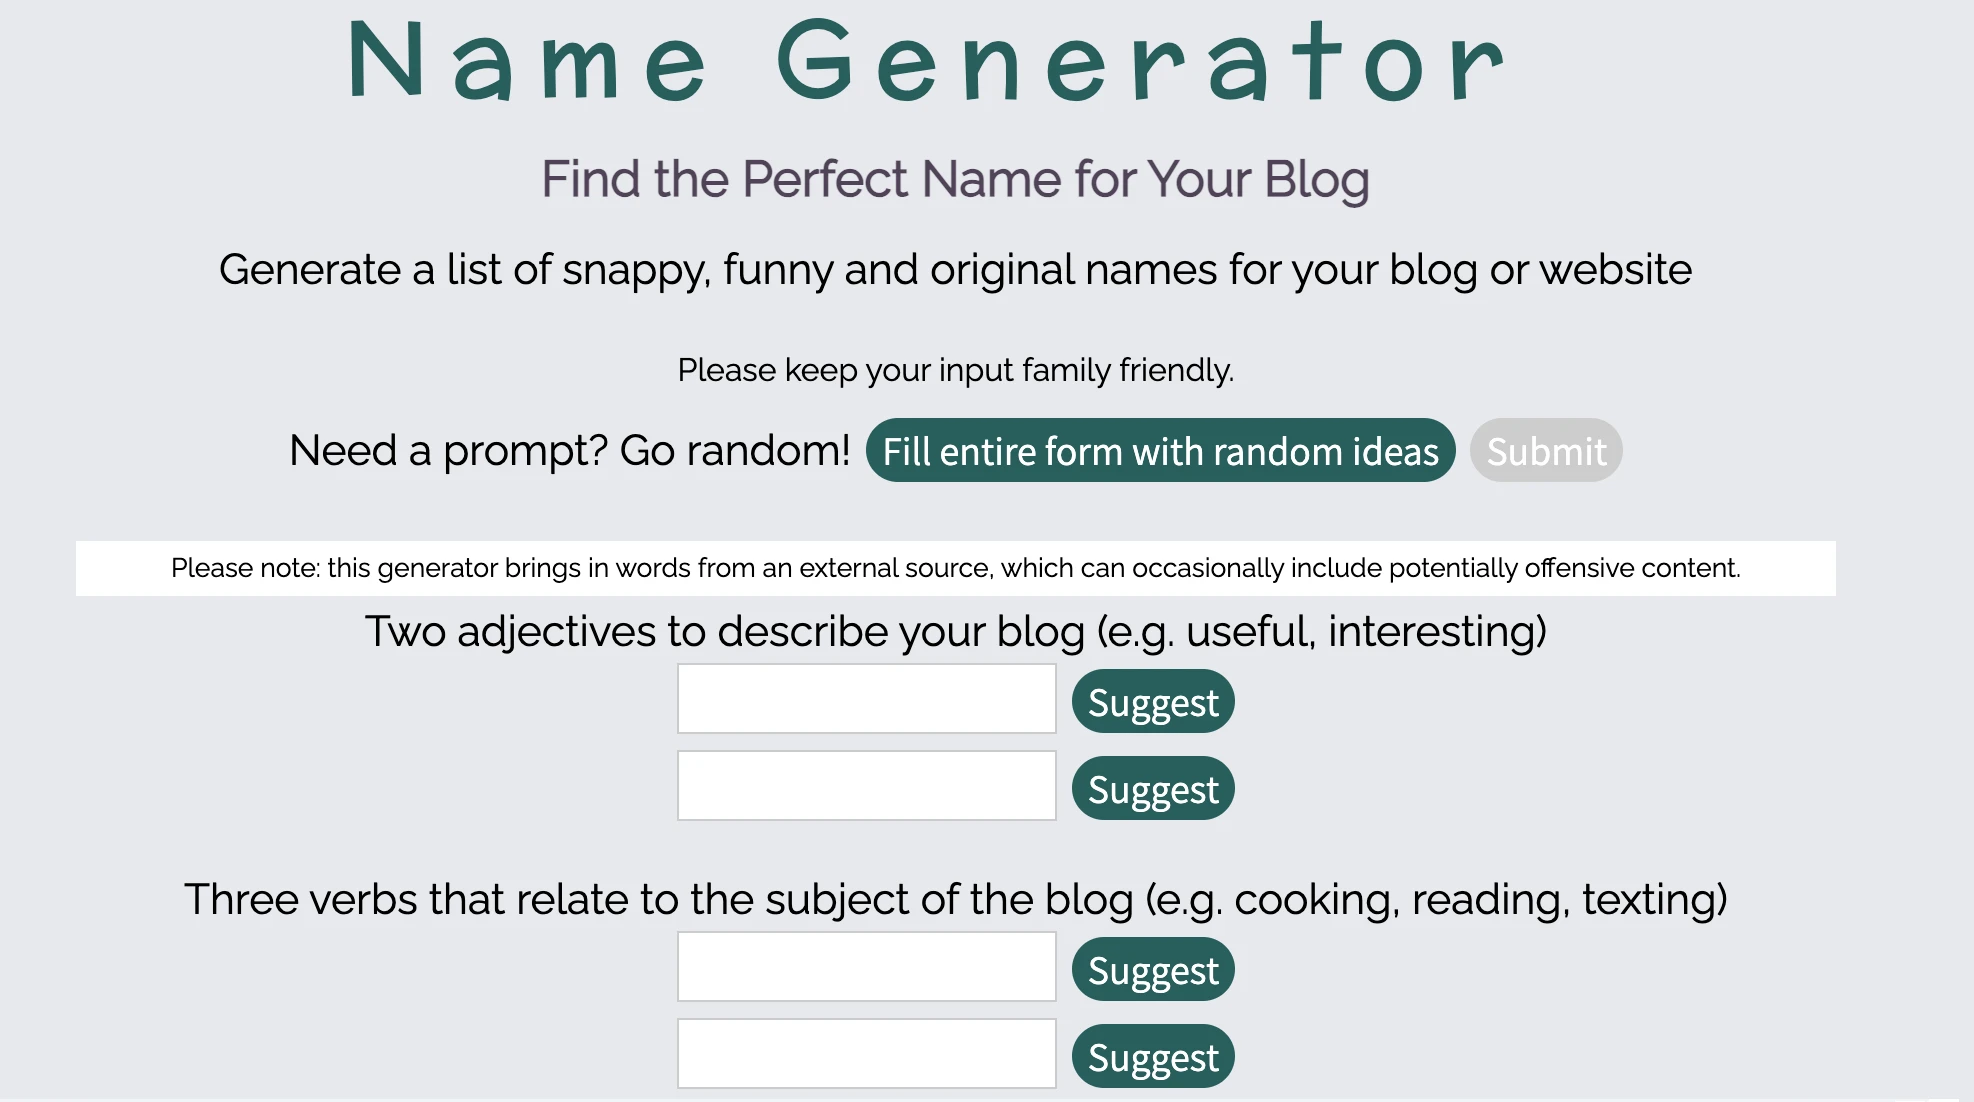
This site asks you to enter some information related to your blog, including its tone and subject matter. It then creates a series of names that you can use for inspiration.
A great blog name should be:
- Clear and relevant: Quickly let readers know what your blog is about. Make sure your niche is accurately described with keywords.
- Short and sweet: Use two or three words to make it easier to remember. Longer names can work, but shorter ones are generally more memorable.
- Easy to remember: Try to avoid complex spelling or numbers. Easy-to-spell and easy-to-pronounce blog names are more likely to be remembered.
Remember to search for the availability of your blog name first so you don’t accidentally encroach on someone else’s trademark.
3. Get Your Blog Online
Now that you’ve settled on a blog name and niche, it’s time to bring your blog online.
Nikola Baldikov of InBound Blogging says, “Choose your hosting method carefully because migrating a website isn’t always easy. If you’re serious about blogging, think about scaling. How will you monetize your blog in the future? What website customization and SEO options do you have? Do your research before you make your choice.”
If you’re serious about blogging, think about scaling.
DreamHost GlossaryHosting Provider
A hosting provider is a business that charges a fee in exchange for “renting” server space and resources. You can choose any hosting provider that you want to launch a new website.
Read More
You don’t need to worry about technical jargon. We’ll break it down for you step-by-step here.
There are two key components you’ll need to launch your blog:
- A blog host: This is your blog’s digital home. It’s where all the files for your blog are stored online. Whenever someone types the address of your blog into their browser, the host delivers your content.
- Blogging software: Essentially, this is what you use to create and maintain your blog. These are like the Lego blocks that build your online space.
The good news is that many blog hosts offer popular blogging platforms as part of their packages. (Example: Psst… Us! DreamHost.)
WordPress is one of the most popular platforms for both beginners and seasoned bloggers. In fact, 43.5% of all existing websites use WordPress. Among its many benefits are its flexibility, ease of use, and extensive community support. (We’ll learn how to install it in a hot minute.)
Step 1: Purchase Web Hosting and Register Your Domain
WordPress doesn’t provide hosting for your blog. Instead, it’s a content management system (CMS) you install on a server. Don’t worry — this isn’t as complex as it might sound.
Content Management System (CMS)
A Content Management System (CMS) is a software or application that provides a user-friendly interface for you to design, create, manage, and publish content.
Read MoreYou will need to sign up for a web hosting plan to get your site online.
To help you out, let’s look at the main types of hosting that are available:
- Shared hosting is the least expensive option for new bloggers. DreamHost plans start at $2.59/month.
- Virtual Private Server (VPS) is slightly more costly but improves performance. As such, this kind of hosting is recommended if you want to focus on growing your blog.
- Dedicated hosting is the most expensive and powerful option. You get an entire server dedicated to your site alone. This is typically unnecessary for a blog unless your site draws unusually high traffic or you want complete control.
It’s also smart to look for hosting companies specializing in WordPress hosting specifically, as that means its services will be well-optimized for the platform.
DreamHost offers a number of top-notch WordPress hosting plans for you to choose from. For a brand-new blog, our shared hosting plans are ideal. They start at just a few dollars a month and provide plenty of resources. (When your blog starts getting more traffic, you can easily upgrade to a more powerful option, such as WordPress-managed hosting.)
To purchase a shared hosting plan, select Sign Up Now on the plans page. Next, you’ll need to choose the billing term for your hosting account: monthly, annually, or every three years. The longer your term, the bigger your discount on hosting.
Shared Starter is the most cost-effective option, although you won’t get a professional email @yourdomain. Instead, for just a few dollars more each month, Shared Unlimited gives you everything you need to thrive online, including a specialized email address.
Step 2: Register Your Domain Name
Next, you’ll register a free domain name (which is included with all annual terms) or enter a domain you already own.
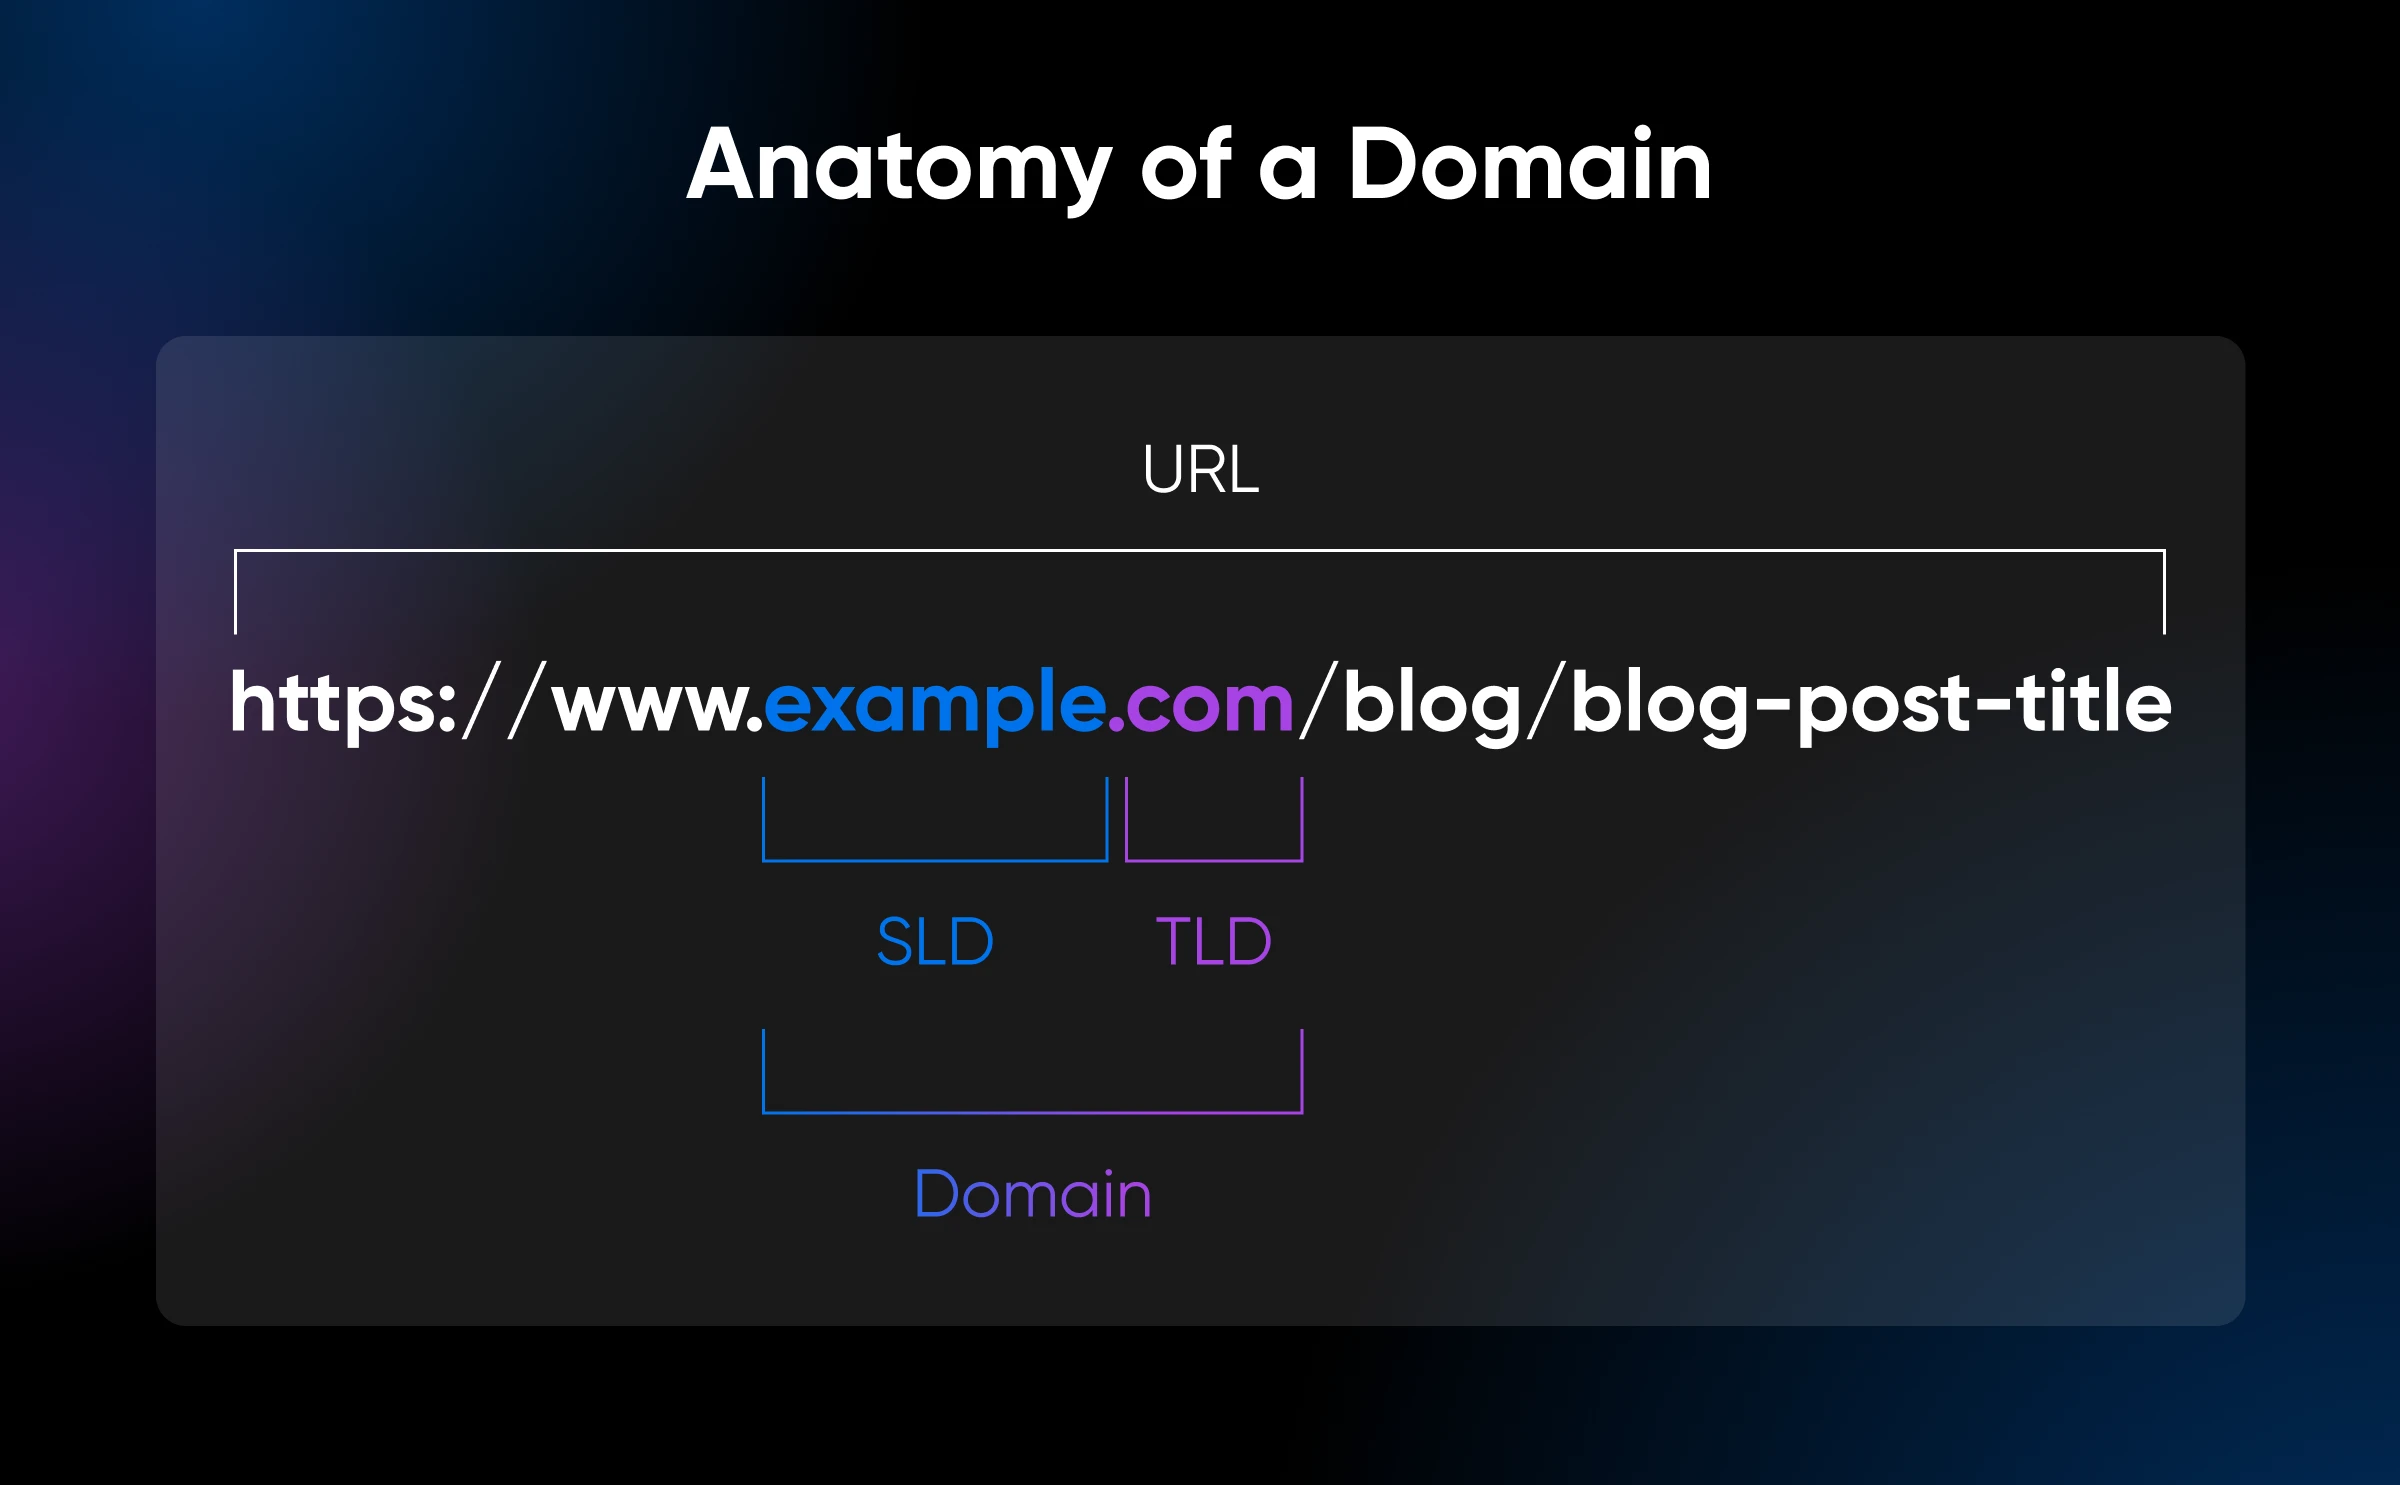
Your domain name is the URL people will use to access your blog. When it comes to creating a domain name, there are several things you’ll want to consider. One of the basic steps involves choosing which TLD you want to use, such as .com or .org.
Note: If you’re pressed for time or unsure which top-level domain (TLD) would be right for your site, you can easily add one later.
Step 3: Install WordPress
For a WordPress blog, you’ll need to, well, install WordPress. If you checked the Pre-Install WordPress box during the sign-up process, you can move on to the next step.
There are two main ways you can install WordPress:
- Manual installation: This requires that you to manually upload and configure the WordPress software on your site. While the process is quick, we only recommend this approach if you’re technically savvy.
- One-click installation: This is an option offered by many web hosts, which allows you to install WordPress on your site almost instantly. As such, you don’t have to worry about configuration or manually installing any files.
A one-click installation tool simplifies the process to start your blog — quickly.
Here’s how you can install WordPress using the DreamHost WordPress installer.
4. Research Your Competition
Congratulations, your blog now has a digital home! Let’s zoom out to see what your competition is doing. Think of it like reverse engineering success. Look for successful blogs in your niche to suss out your competitors. What are they doing that’s working?
Look at how they build credibility with their strategies and tactics without copying them outright.
Here are some tips for analyzing competitors effectively:
- Identify true competitors: Not everyone is a rival. Consider blogs that target the same audience and niche as your own. Think about factors such as the blog’s topics, tone, and target audience. For example, it’s highly unlikely a family blogger will also write about decentralized finance.
- Learn from their aesthetics: 94% of first impressions are related to visual design. Take note of each competitor’s branding, color scheme, and theme. Finding out what visual cues resonate within your niche is great. For example, a sustainable-living blog might use earthy colors, whereas a tech blog might use more sleek, modern designs. Take note of overlapping interests and how you can differentiate your content.
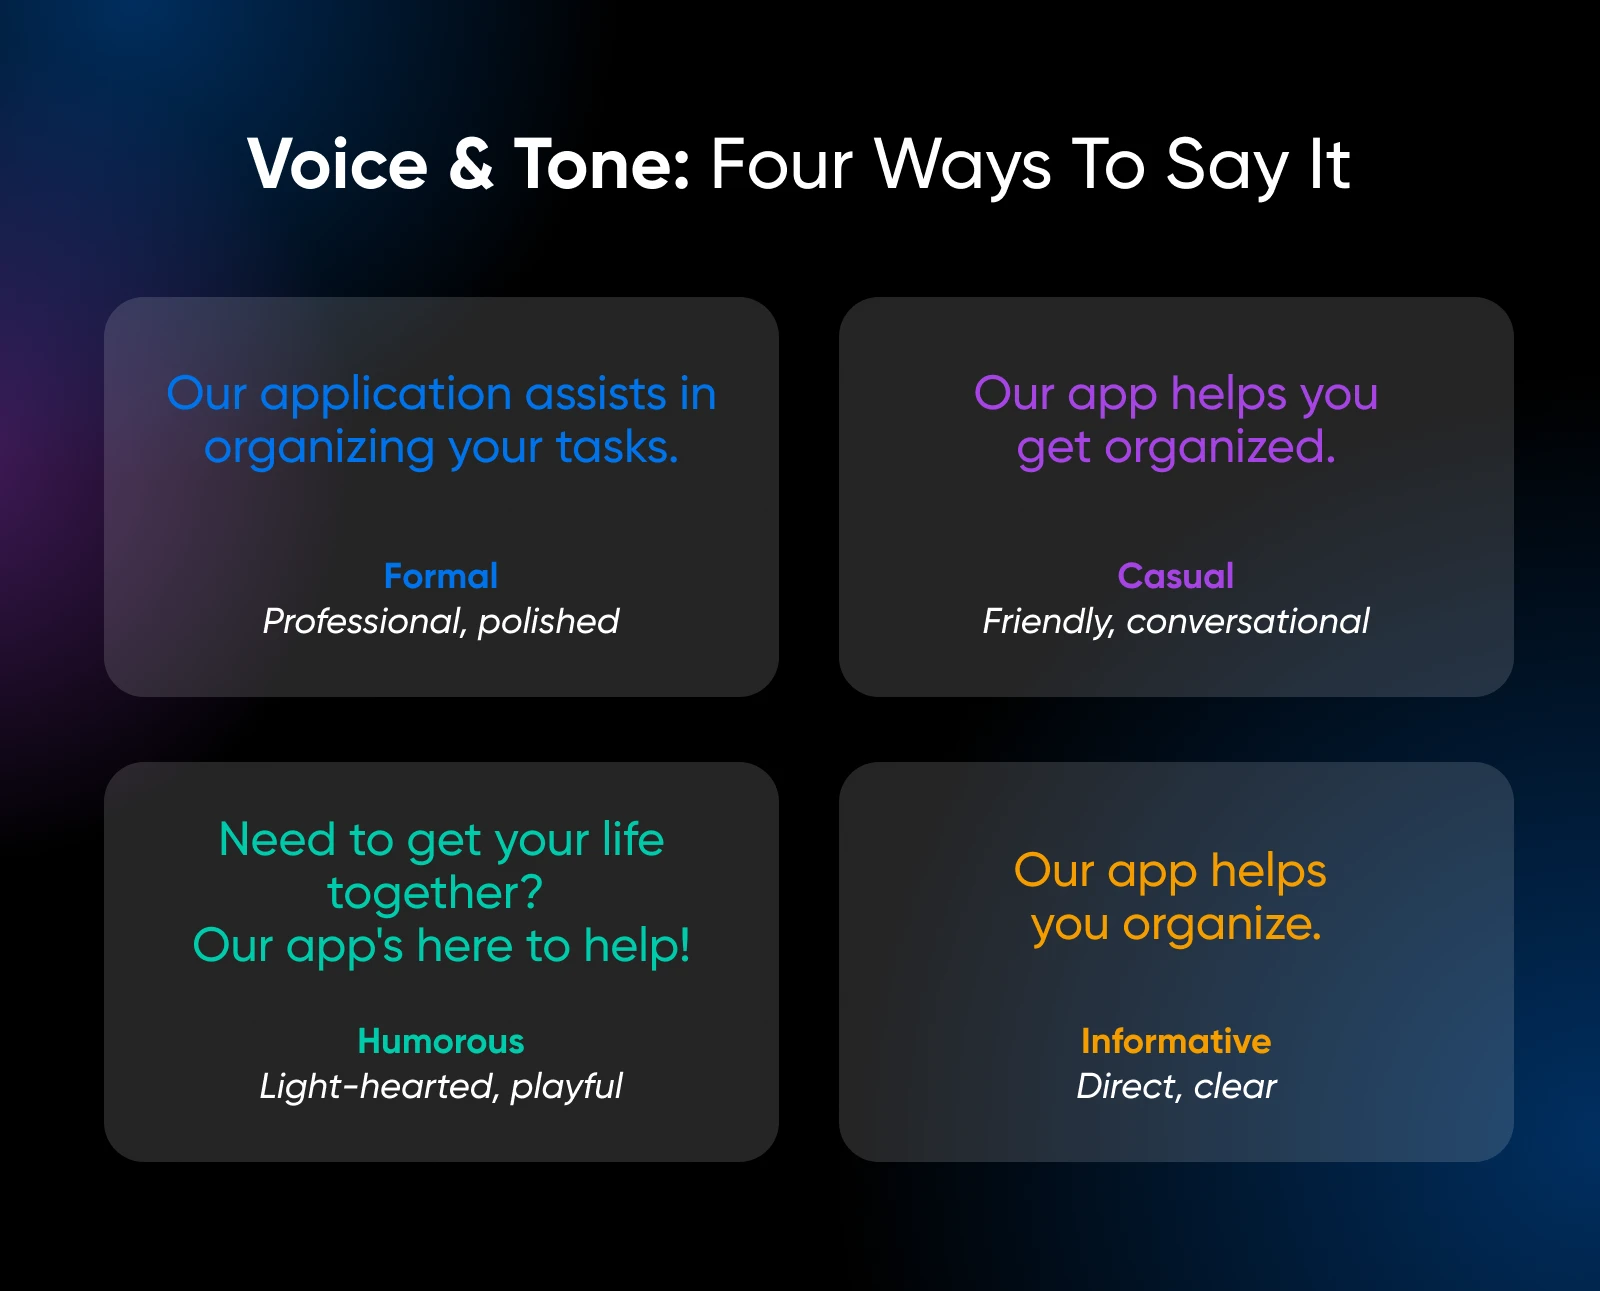
- Analyze their voice: What’s their style of writing? How formal, casual, or humorous is the tone? You don’t want to duplicate them, but you can find out what makes their content work.
Above all — know your strengths. If in-depth tech reviews aren’t your forte, maybe another writing style would be more in your wheelhouse. Your focus should be on what is realistically achievable and, more importantly, enjoyable.
5. Create a High-Level Blog Content Strategy
An effective blog content strategy involves systematically driving traffic to your blog and bringing in new readers through an actionable plan.
You may be asking, “Do I really need one?”
You need a blog content strategy if you want your readers to become loyal fans. Because loyal fans will consistently drive traffic to your site and help you monetize your blog over time. A successful content strategy starts with understanding your audience, their pain points, and your unique value proposition.
Here’s how to set up a blog content strategy:
- Define your blog’s purpose and goals: Decide what your blog’s primary objective is. What type of blog is it? A personal blog? A company blog as part of a broader content strategy? What is your goal? Is it to promote your personal brand, drive sales, or educate your audience?
- Deep dive into your audience: Build fictional representations of your ideal readers, including demographics, psychographics, pain points, and goals.
- Articulate your unique selling proposition (USP): Identify what makes your blog unique. How do you stand out from your competition?
- Establish content pillars: These will shape the identity of your blog. Choose a few primary topics to focus on. Ideally, they should be aligned with your blog’s overall mission and resonate with your audience’s interests. Then, within each pillar, develop subtopics to create a well-rounded blog content strategy.
What does this plan look like in action? Let’s look at a blog content strategy for an eco-conscious thrifting enthusiast based on what we’ve discussed above:
- Purpose and goals: Inspire and educate others about how thrifting can help you live a more sustainable life. Aims to promote ethical consumption, collaborate with sustainable brands, and build an eco-conscious thrift community.
- Ideal reader: People who care about the environment and are looking for fashionable and affordable clothing. They place a high value on individuality, sustainability, and ethical consumption. They often have difficulty finding sources of sustainable fashion and feel overwhelmed by fast fashion.
- Unique angle: Curate thrifted looks and provide styling tips for different body types and occasions using unique thrifted items. Emphasize thrifting’s creative and personal aspects.
- Content pillars: Thrifting 101 — how to find hidden treasures, thrift store etiquette, and tips for beginners; Thrifting Fashion — DIY fashion projects, thrifted outfit ideas, and styling challenges; Thrifting on a Budget — thrift store hauls, upcycling ideas, and money-saving tips.
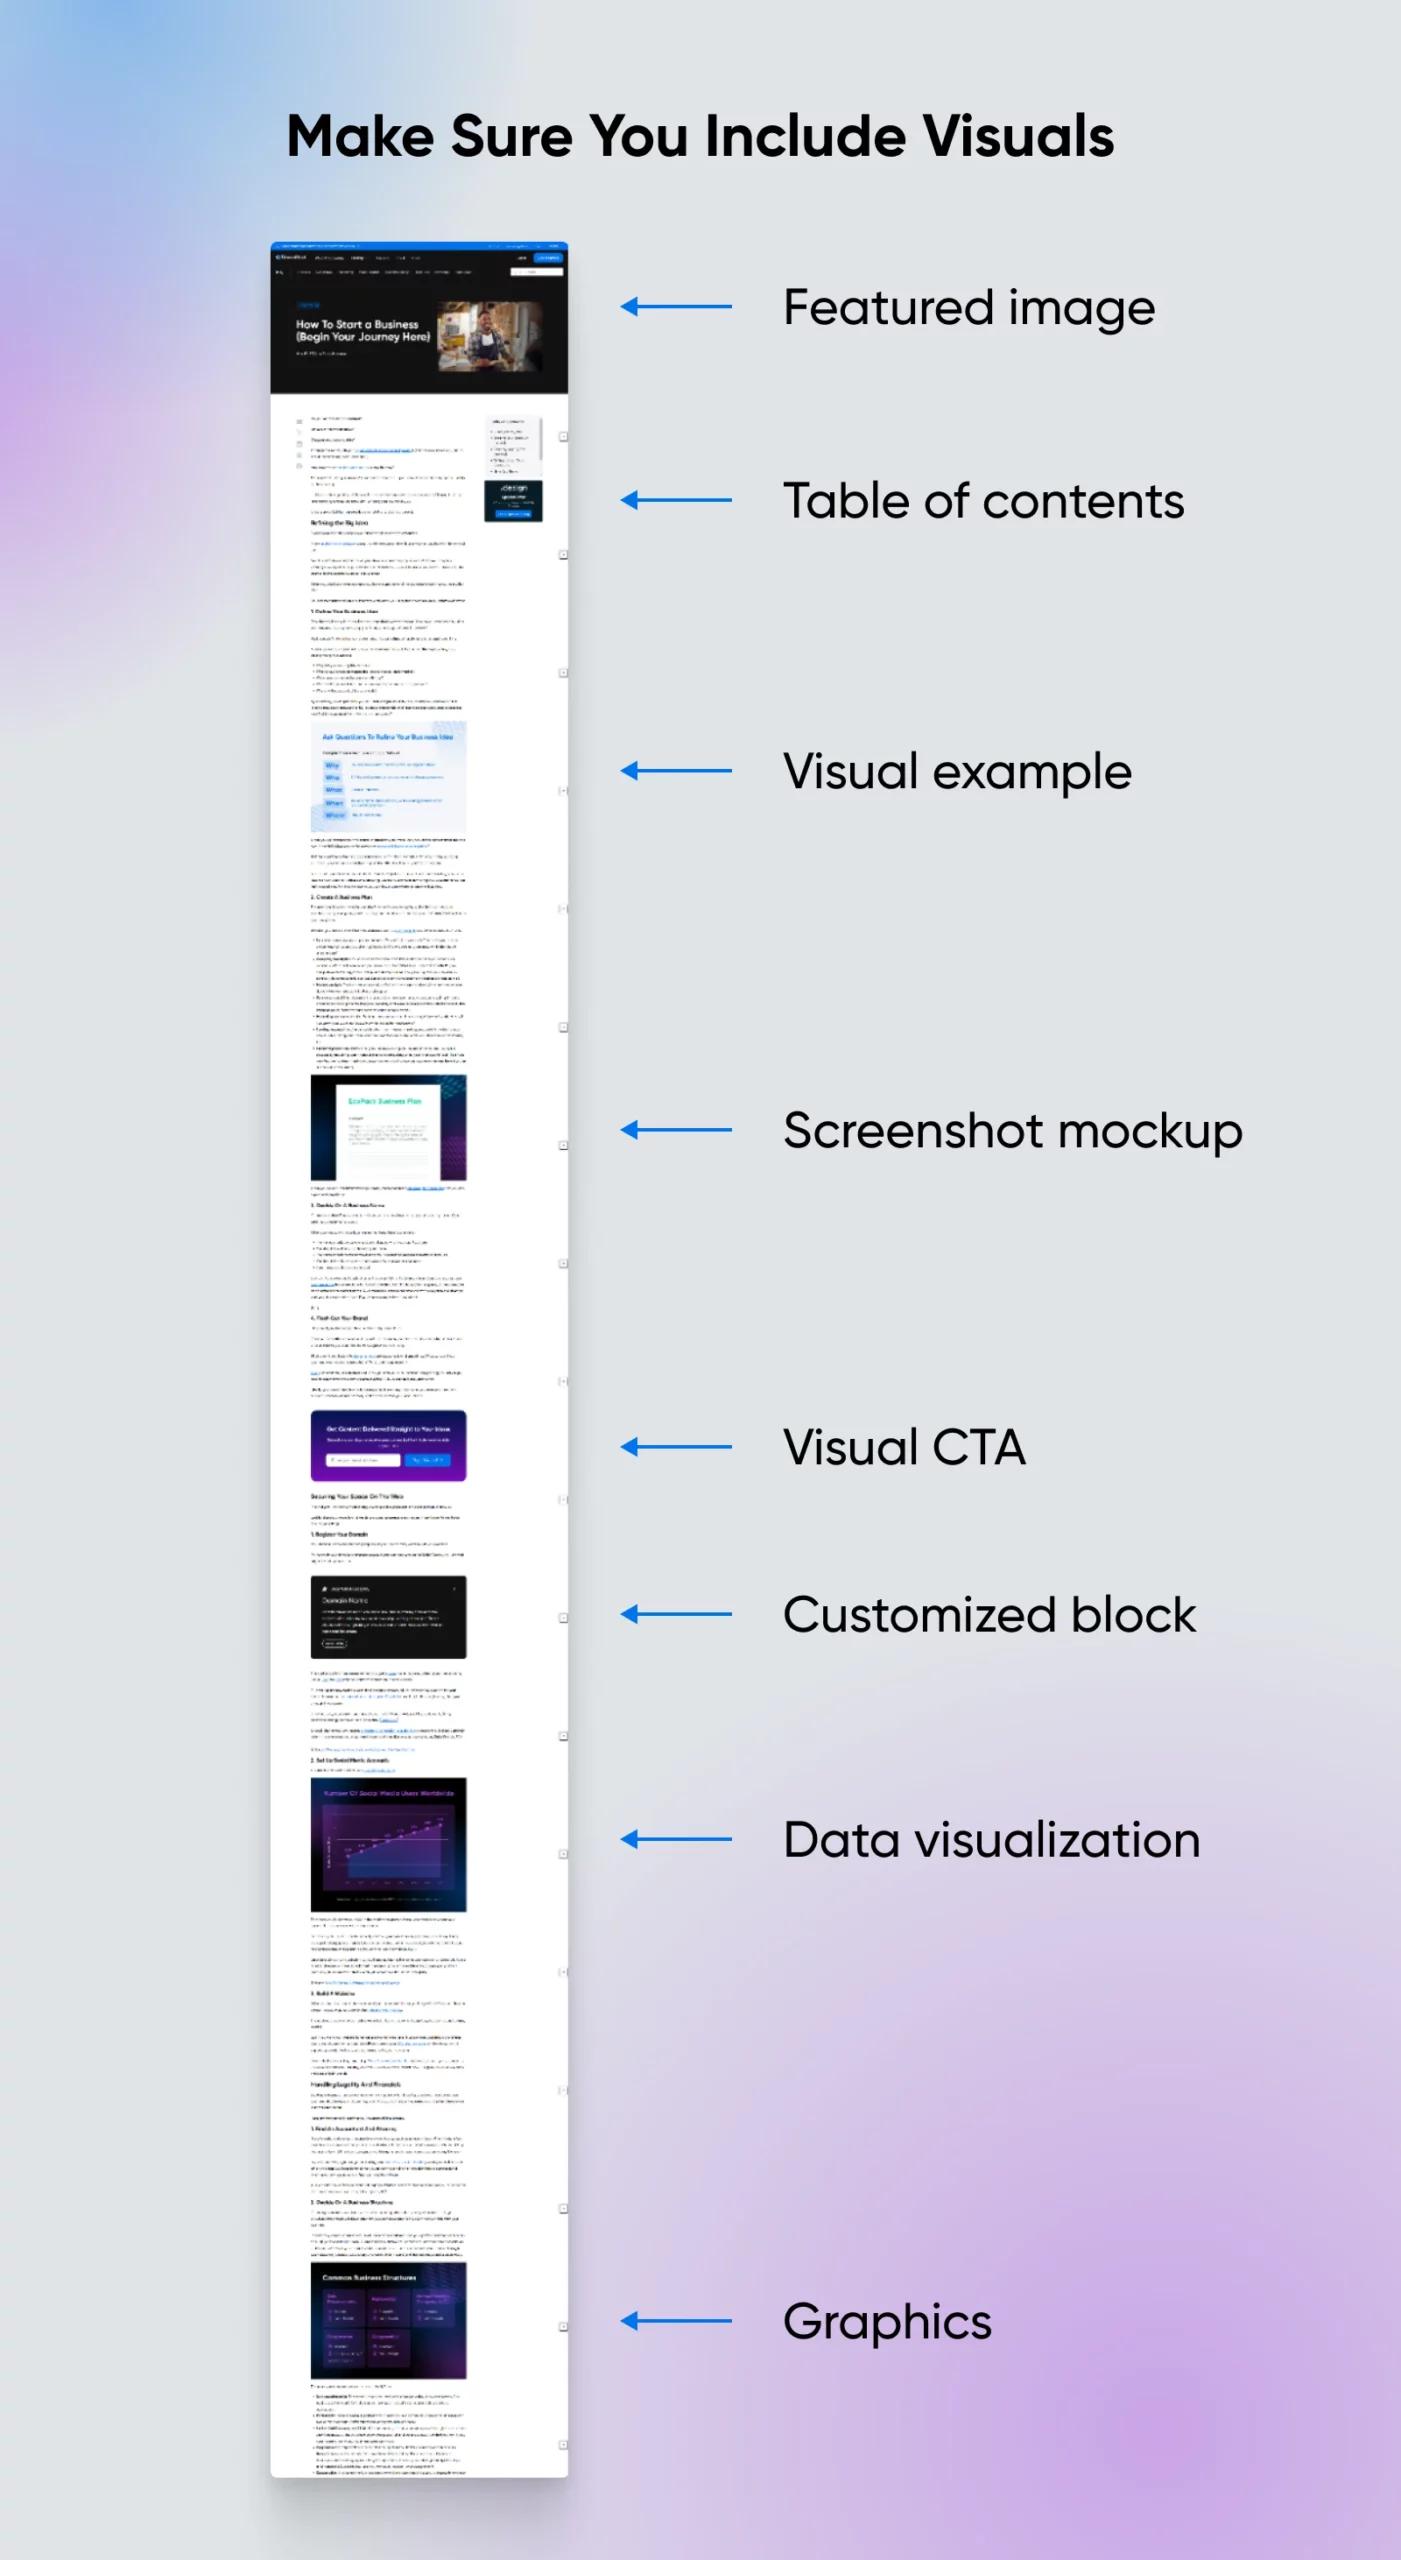
Include Visuals
Every blog needs image content. People usually skim, not read, so one of your biggest blog assets is strategically placed visuals. We only digest 20% of written content, which is why images are so important for conveying your message.
Here are some ways to make your blog stand out:
- Make your data visually appealing: Diagrams, charts, and graphs aren’t just pretty pictures; they’re powerhouses of information. They’re like mini-stories that capture your readers’ attention and convey complex information quickly.
- Create quote images: Don’t bury your best quotes in text. Bring them to life with stunning visuals. You can customize premade templates with tools like QuotesCover and Canva in seconds. Simply choose a background, select your font, add your quote, and you’re done!
- Try stock photos: While not the most original, they’re helpful when you don’t have a lot of time or creative juice left in you. In most cases, a generic image is almost always better than a blank space. There are lots of free tools for stock photographs you can test out, like Unsplash, Pexels, and Pixabay.
- Use an image at every “scroll depth” in the entire blog post: Imagine a reader scrolling down and finding something visually engaging every time. That’s exactly what you want.
Once you’ve established your blog’s foundation, it’s time to brainstorm blog post ideas.
6. Brainstorm Blog Post Ideas
Brainstorming blog post ideas can be overwhelming. But you’re not going in blind.
Based on your content pillars, find blog post topics through keyword research. We recommend using the Ahrefs Keyword Generator, because it’s comprehensive and free:
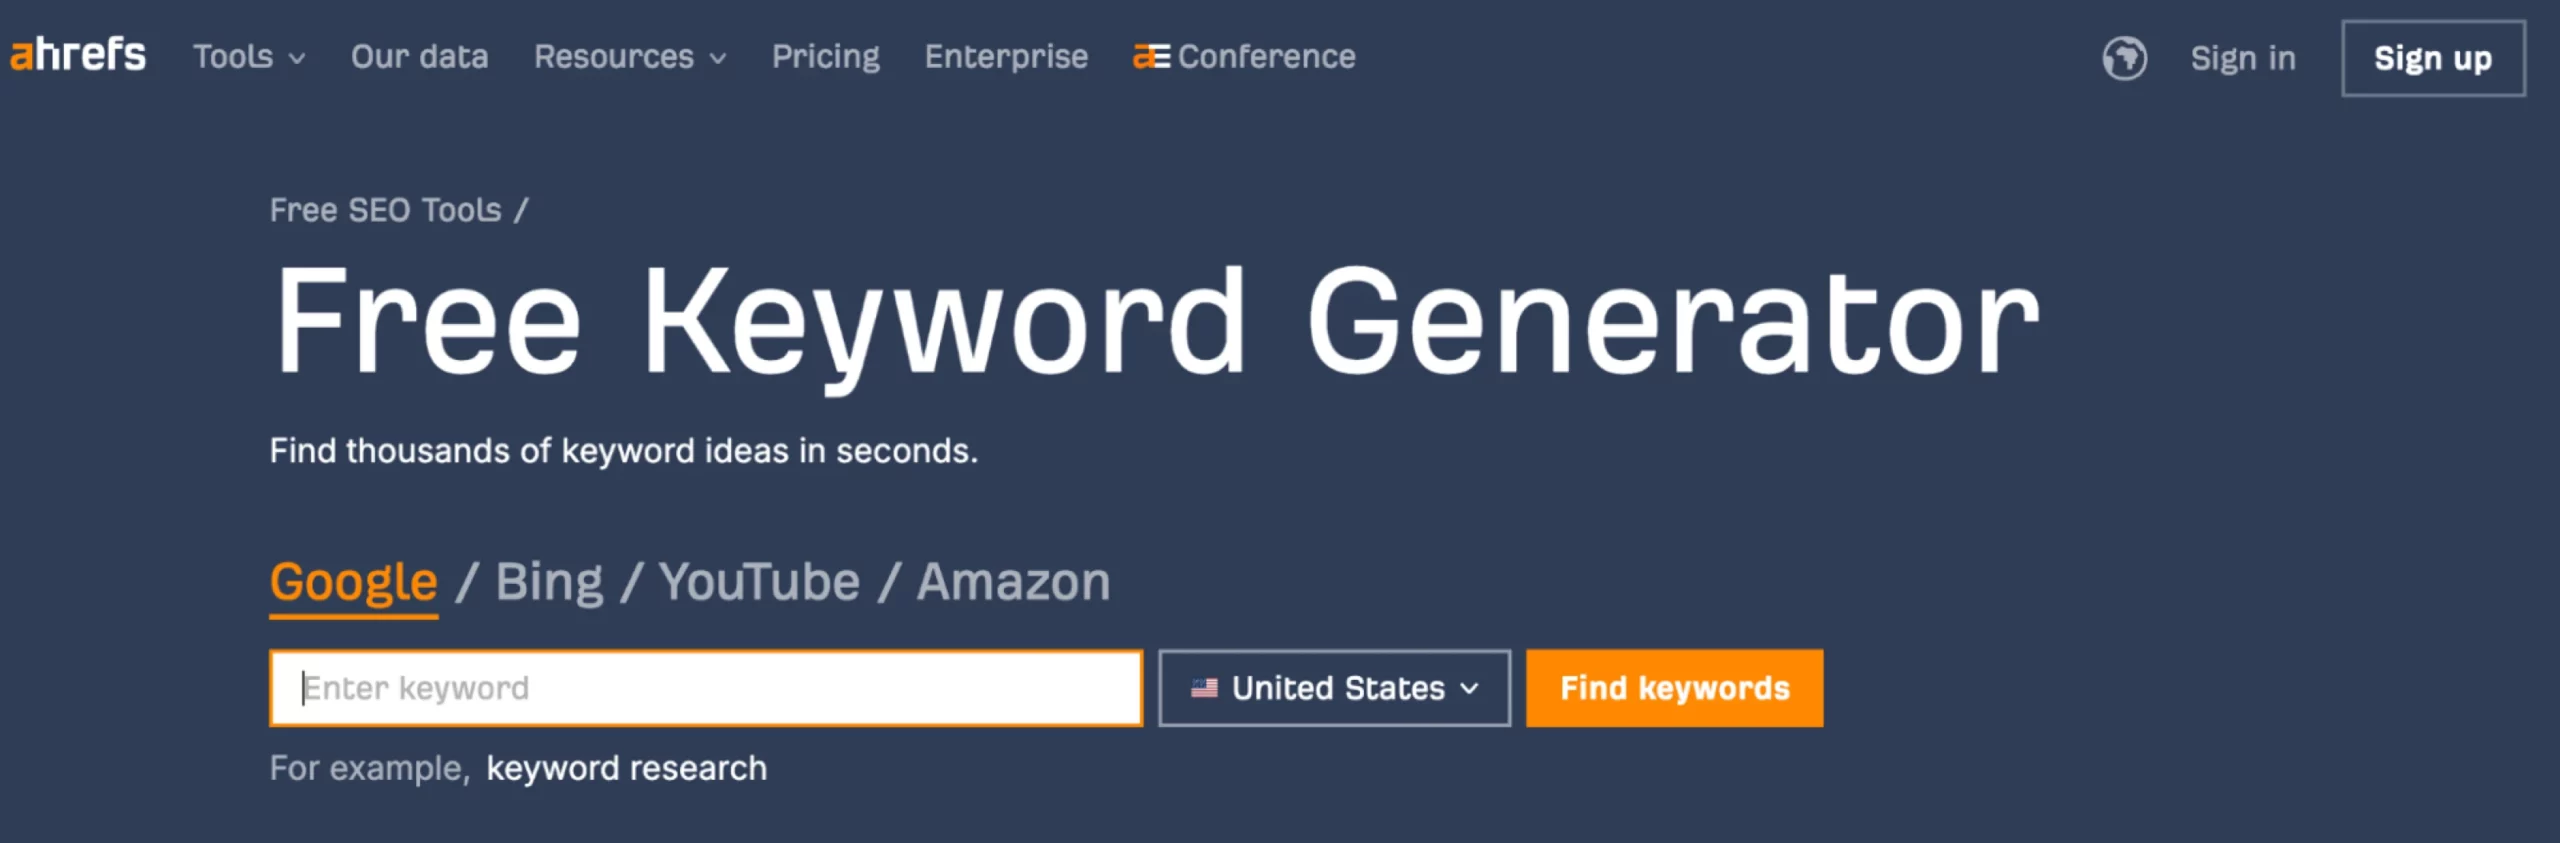
With this tool, you can search for keywords related to your blog to see what your audience is interested in. For example, if you enter the keyword “men’s fashion,” you’ll see that popular keywords include “y2k men’s fashion” and “1920s men’s fashion.”
Here are some more tips on how to create a steady stream of content:
- Newsjacking: Use current events and trends to create timely, relevant content in your niche. For example, if you run a fitness blog, you can cover landmark sporting events like the Olympics and create workout routines based on the athletes’ training plans.
- List posts: Create easy-to-consume content like “Top 10” or “How-To” lists. Say you have a personal blog about vegan cooking. Here’s an idea: “5 Best Vegan Protein Sources.”
- Personal experiences: Tell your stories and offer insight into your niche. If you’re a travel blogger, you can share a personal story about getting lost in a foreign city.
- Competitor analysis: Follow what’s working for your competitors, but add your own twist. For instance, if you’re in the eco-conscious fashion niche, you may see a popular fashion blogger creating content on sustainable fashion. You could create a similar series that focuses on pocket-friendly, sustainable options.
Nerd note: It may seem like a small, silly thing, but talking about yourself on your blog is important — don’t neglect your blog’s About Me page. This page is crucial for helping readers get to know you, your purpose, and what they can expect to find on your site.
“This is one of the most highly trafficked pages on any blog because it tells people who you are, gives your background, and explains why someone should follow you,” writes Matthew Karsten, travel blogger at The Expert Vagabond. “Keep it fun and personable. Let your readers know who you are!”
7. Customize Your Blog With Free WordPress Themes
The visual appeal of your blog is important. Why, you ask? Consider this: 46.1% of online visitors assess your brand’s credibility based on your website’s visual appeal.
Before you start writing, let’s design your blog so it reflects who you are, and what you want to talk about.
You can easily change the appearance of your blog with a free WordPress theme.
A theme works like a template you can install on your site, which determines its layout and overall design. Some themes also include additional functionality, and there are plenty of free and premium themes to choose from.
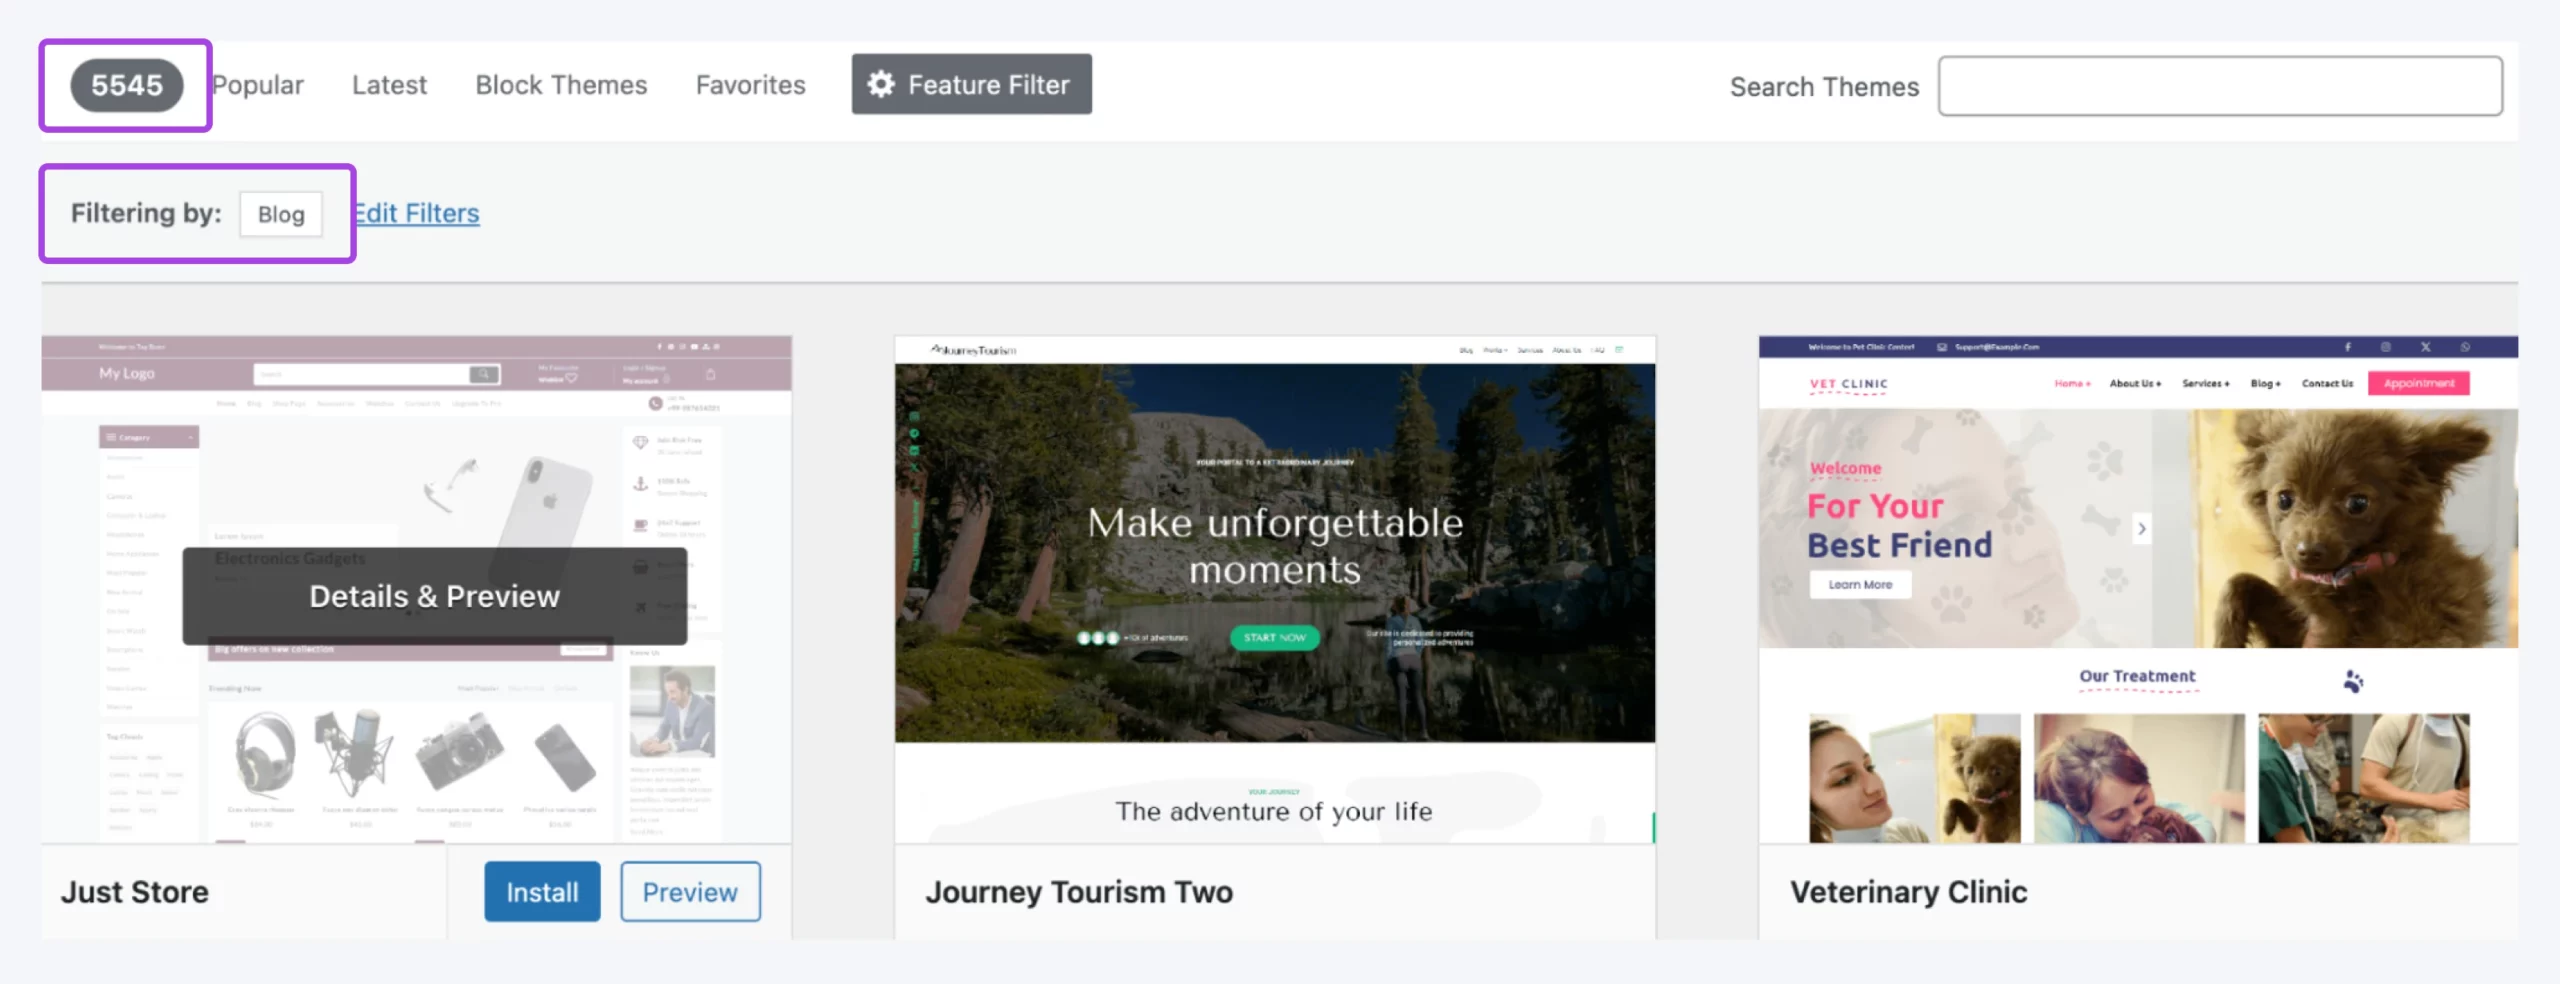
For the time being, you only need to worry about finding the one that fits your blog’s intended style. Picking the right theme can be a struggle if you don’t know where to look, but an excellent place to start is the official WordPress Theme Directory:
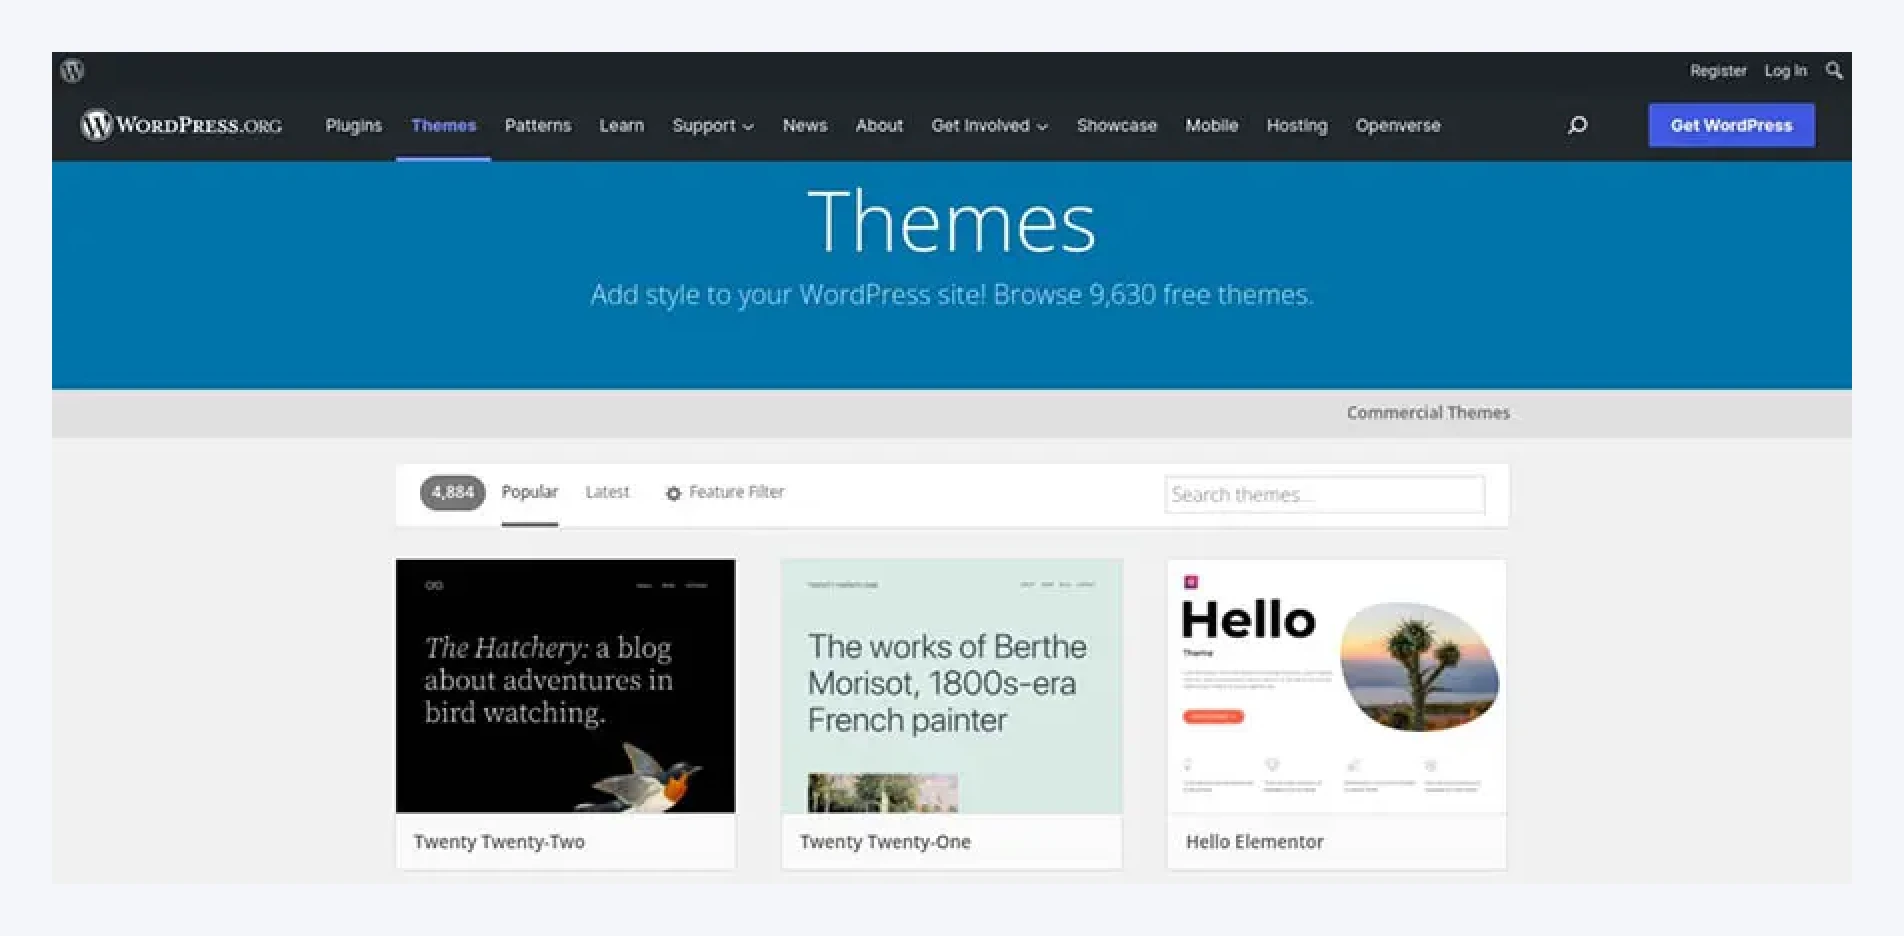
Here, you’ll find hundreds of free themes in several different categories. You’ll probably want to use the Feature Filter to narrow down the options:
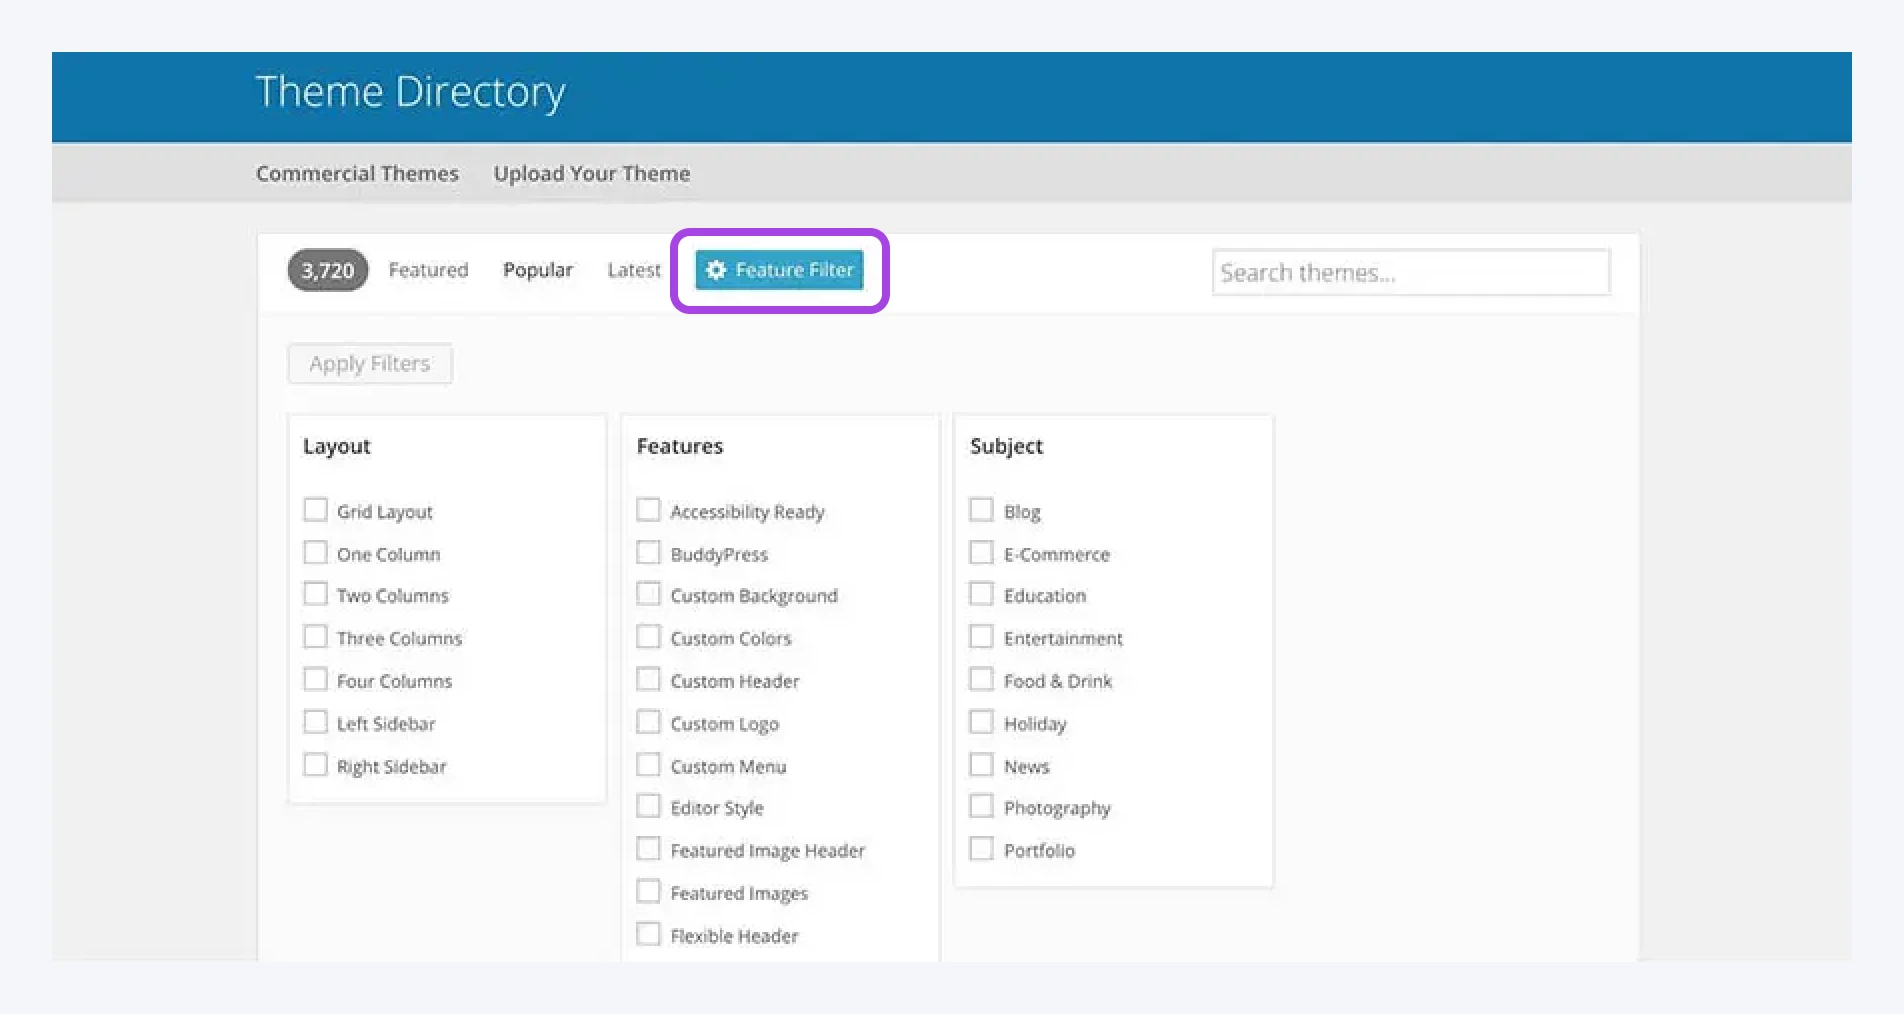
As you can see, there’s even a search filter called Blog. If you select this, you’ll see all the themes created specifically with blogs in mind:

When you find a theme you want to use, you can download it and install it on your site. You can also do this through your WordPress dashboard by navigating to Appearance > Themes:
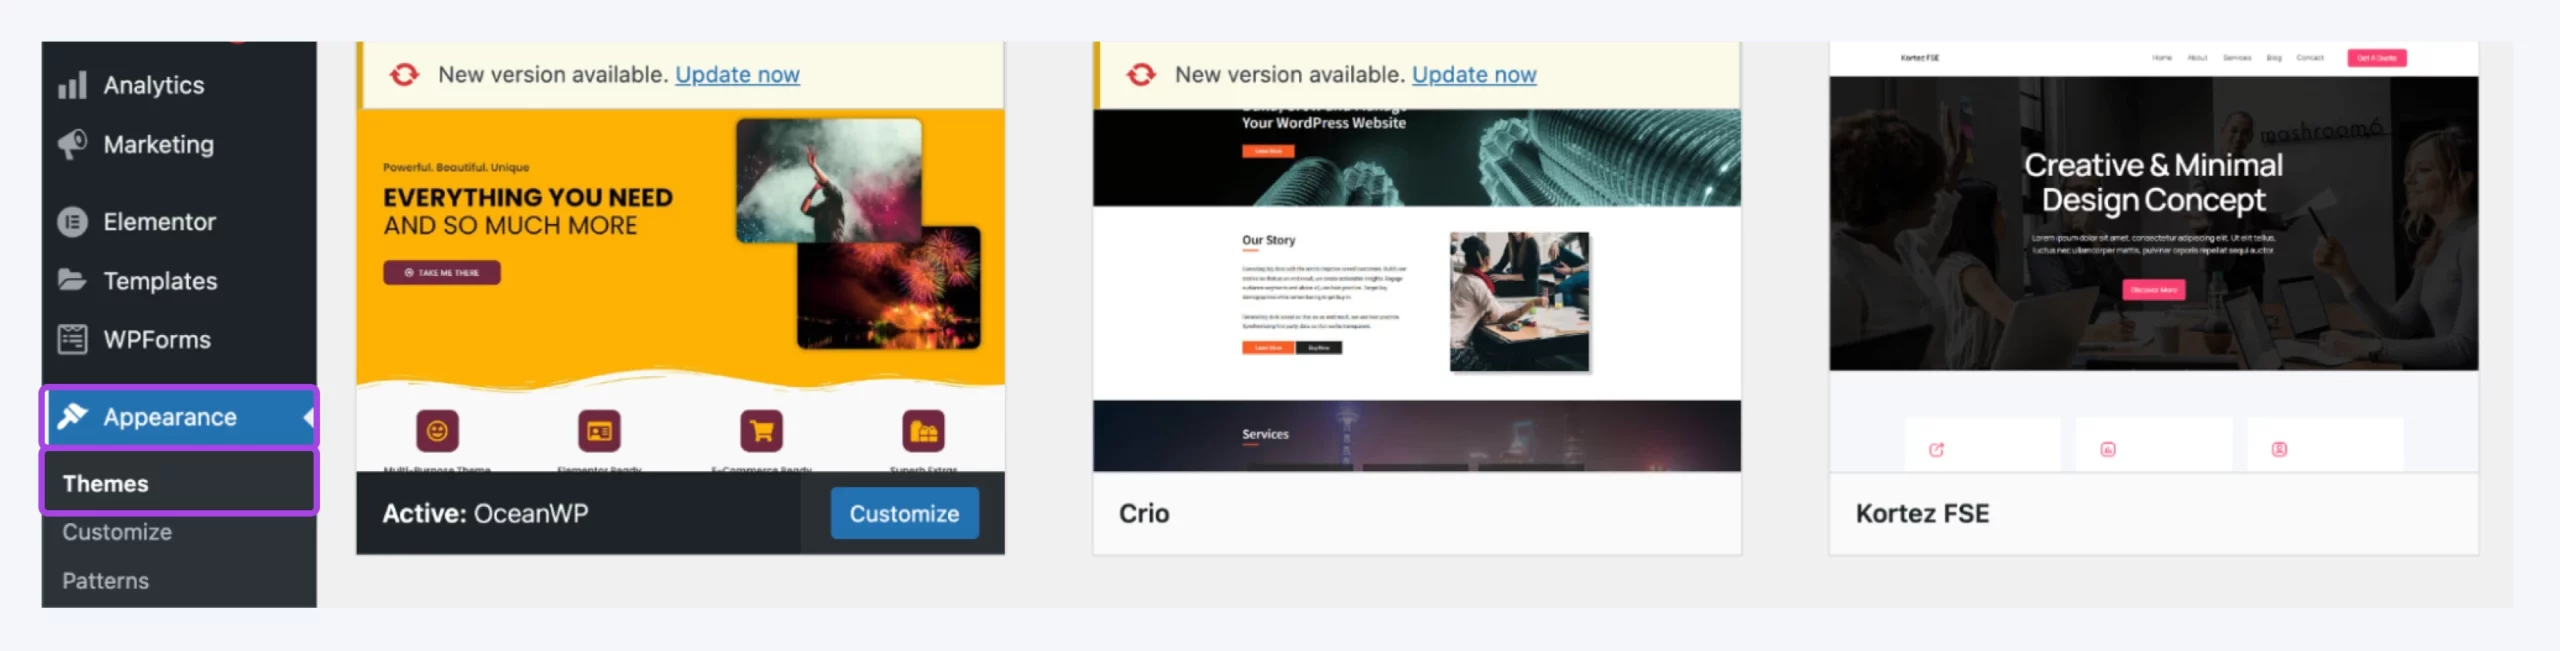
Here, you’ll see your currently installed themes. You can install new ones by clicking on Add New. This opens the Theme Directory again, letting you download and activate themes directly from this interface.
Hover over your choice, and click on Install:
After the theme installs, click Activate to set it as the current theme for your site.
Et voila! Your entire blog now looks exactly how you want it.
8. Write Your First Blog Post
Next up: write a blog post — the main event in blogging.
A typical blog post usually clocks in at 600–2,000 words or more.
Once you’ve found the right keywords, start writing your first blog post. Here are some basics to get the blogging ball rolling:
- Choose an attention-grabbing post title: The key to creating a snappy headline is to make it informative and specific. Try to describe the article’s contents while still keeping it concise.
- Create an outline: Divide the post into clear sections with descriptive headings. The first step to writing a successful blog post is planning out your key points and the flow of your writing beforehand.
- Write a compelling introduction: First impressions matter, especially in blog posts. Flop in those opening lines, and your readers are gone. So, tell a story, crack a joke, share a mind-blowing statistic — whatever it takes to catch their attention. Then, explain the why. In what way does your post provide a solution to a problem? How will it benefit them? Show them the value, and they’ll stick around for the juicy details.
- Flesh out the outline: Dig into each point. When you hit a snag, do some quick research to find more information, examples, and data. Remember to cite your sources — accuracy and credibility build trust.
- Give thought to your calls to action: Oleg Segal of DealA says, “Having a call to action in each post, whether it’s to subscribe, share, or leave a comment, can help in engaging your readers and building a community.”
Looking for more tips? Here’s our step-by-step guide on how to write a great blog post.
9. Optimize Your Blog Posts for Search Engines
We aren’t done just yet. Optimizing your posts for specific keywords can increase the likelihood that they’ll appear when users search for them.
This is known as search engine optimization (SEO) and is necessary for increasing traffic and visibility for your blog. SEO involves several tasks, including (but not limited to) increasing your site’s speed and getting backlinks from other sites.
Backlink
A backlink is a link from one website to another. If site A links to site B, B has a backlink from A. Similarly, if site B links to site A, A gains a backlink from B.
Read MoreBoris Dzhingarov, CEO of ESBO, says, “Learn what SEO stands for and don’t be afraid to try it yourself. Although not everyone is tech-savvy, optimizing your content for best SEO practices isn’t something that requires hard IT skills.”
Although not everyone is tech-savvy, optimizing your content for best SEO practices isn’t something that requires hard IT skills.
Let’s explore a couple of ways you can optimize your blog posts for visitors and search engines.
1. Install an SEO Plugin
Earlier, we discussed the importance of keyword research when finding topic ideas. Keywords are phrases that people enter into search engines to find what they’re looking for.
When it comes to your blog, the most essential step is to optimize the posts themselves. Several SEO tools can help you do this, one of the most popular options is Yoast SEO:

Yoast SEO is a freemium plugin that adds a new section to your WordPress editor:
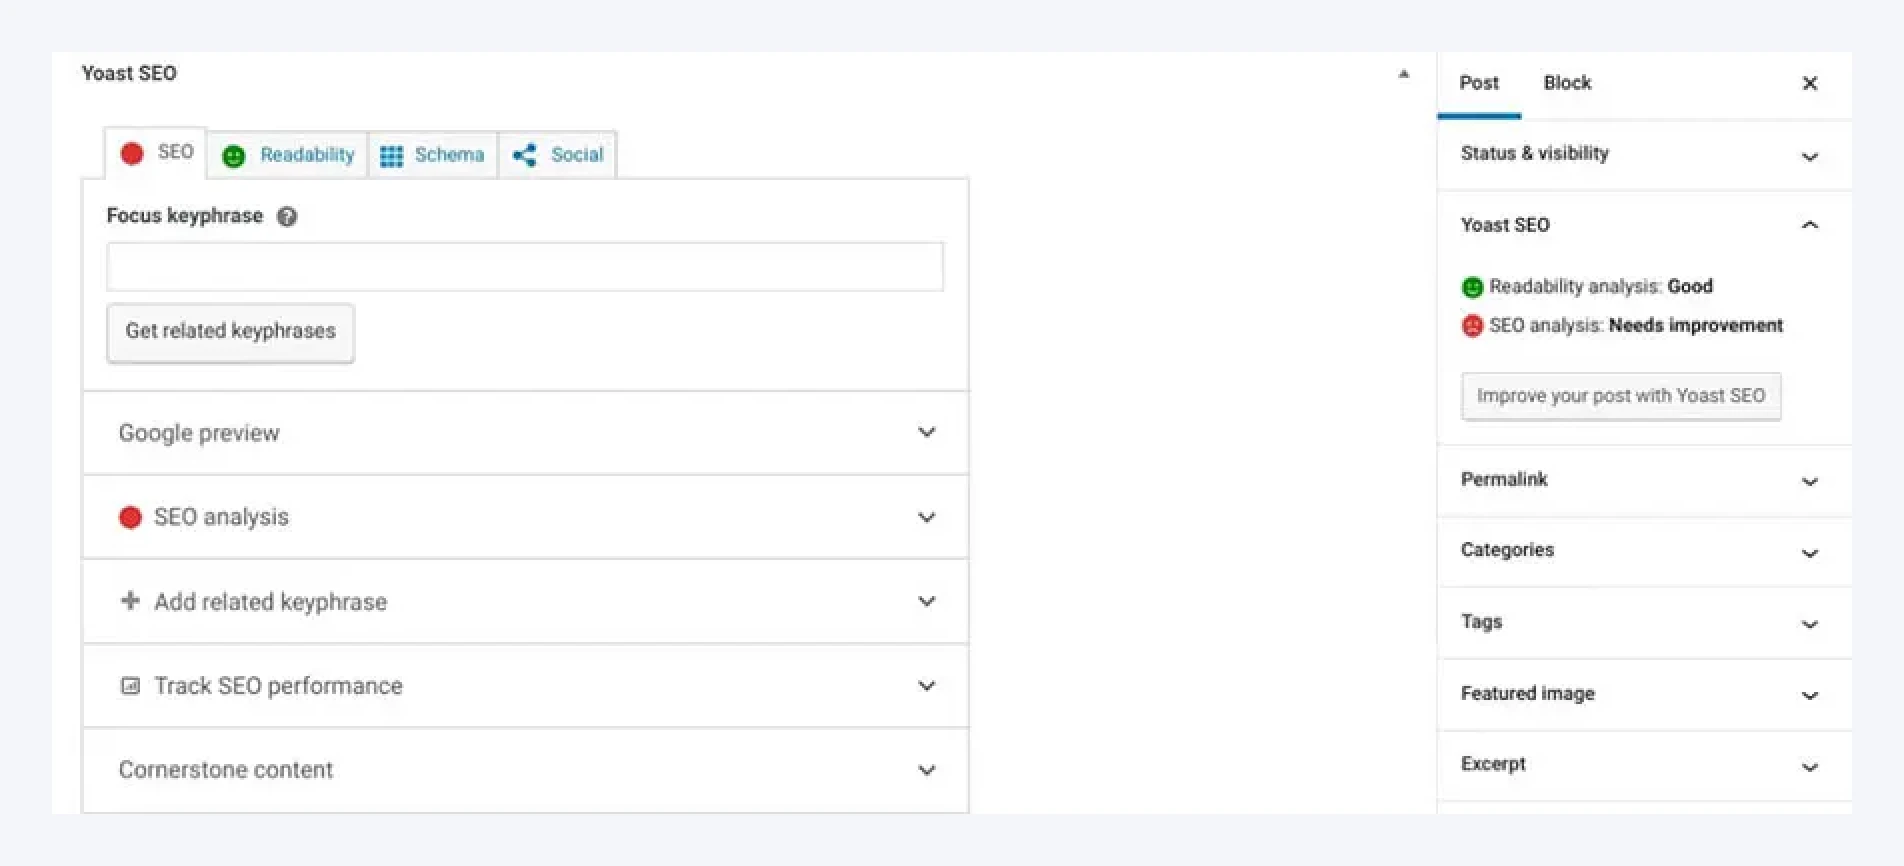
Here, you can set a “keyphrase” for your post, which is the keyword you want to optimize for. Once you’ve done that, Yoast will show you in real time how well-optimized the post is, giving you specific advice on how to improve it:
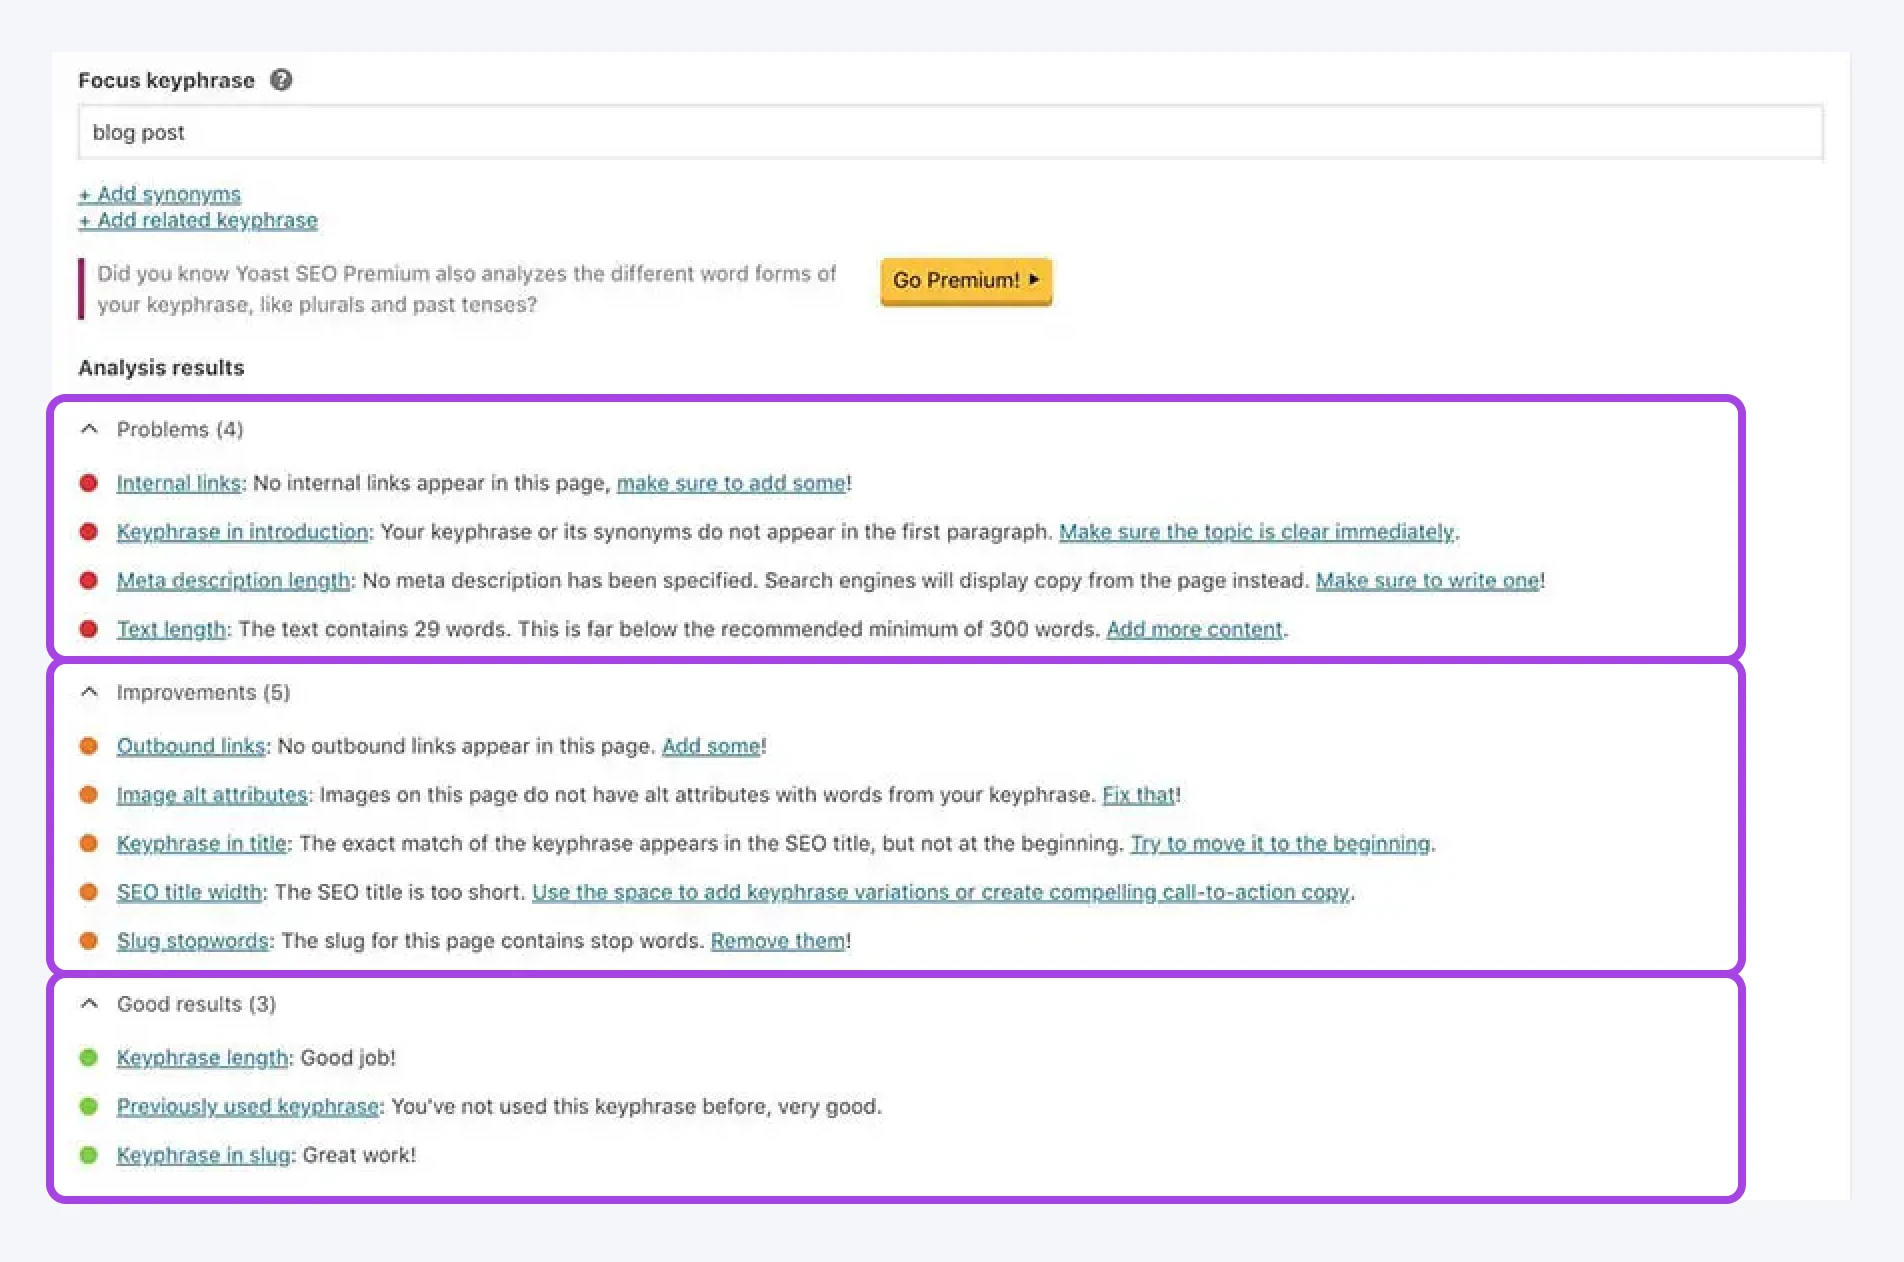
Yoast SEO also lets you add a meta description, a snippet of text that appears alongside the post in search results. By adding a description and following these guidelines, your blog posts are more likely to rank higher in relevant search results.
2. Set a Schedule (And Stick to It)
Google tends to favor sites that publish unique and relevant content on a consistent basis. It’s also important to publish posts on a schedule to help boost readership.
Michael Sandford launched his music blog, Pink Wafer, in 2018, and it reached over 90,000 monthly users at its peak. In terms of posting frequency, he recommends “being realistic with yourself.”
“At my peak, I used to post between four and 10 articles per month. Four wasn’t too difficult, but 10 is quite hard-going. However, there is no hard and fast rule for what’s right. If you have one article that is performing really well, your time may be best spent promoting that one article, rather than forcing yourself to write articles that you think may not work out so well.”
If you have one article that is performing really well, your time may be best spent promoting that one article, rather than forcing yourself to write articles that you think may not work out so well.
According to the experts we’ve interviewed, if you’re just starting a blog, you can realistically aim for two blog posts per month to gain momentum.
They all have one piece of overlapping advice, though: progress over perfection.
The good news is that there are tools to help you stick to your schedule. One such solution is the Editorial Calendar plugin:
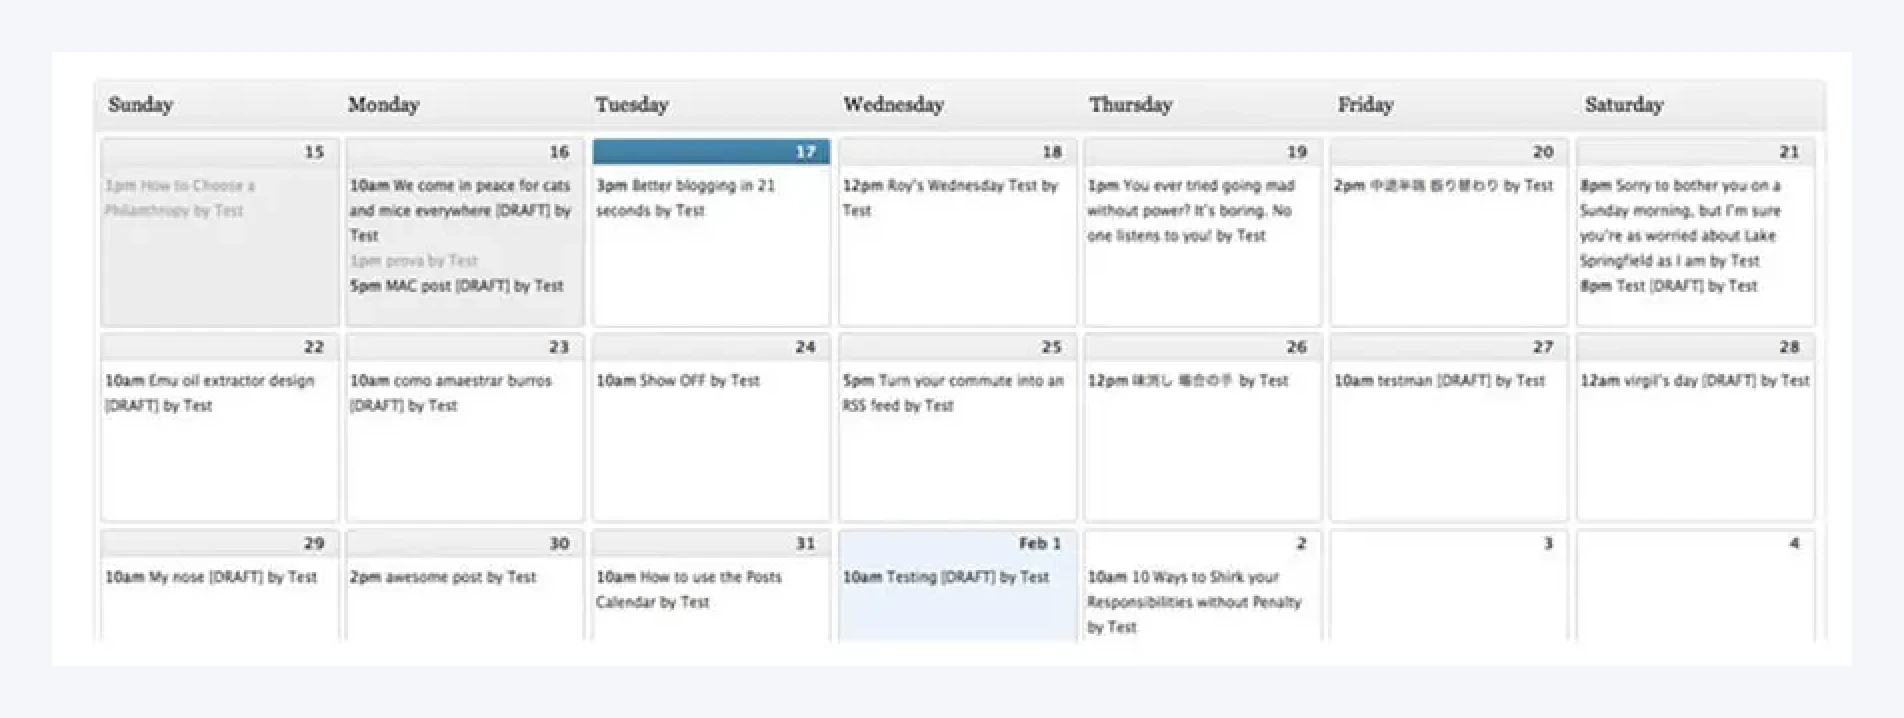
This tool lets you create a calendar for your posts and even schedule drafts to be published at a specific time and date. You can easily track upcoming deadlines and follow your schedule without any risk of slipping up.
10. Publish Your Blog Post!
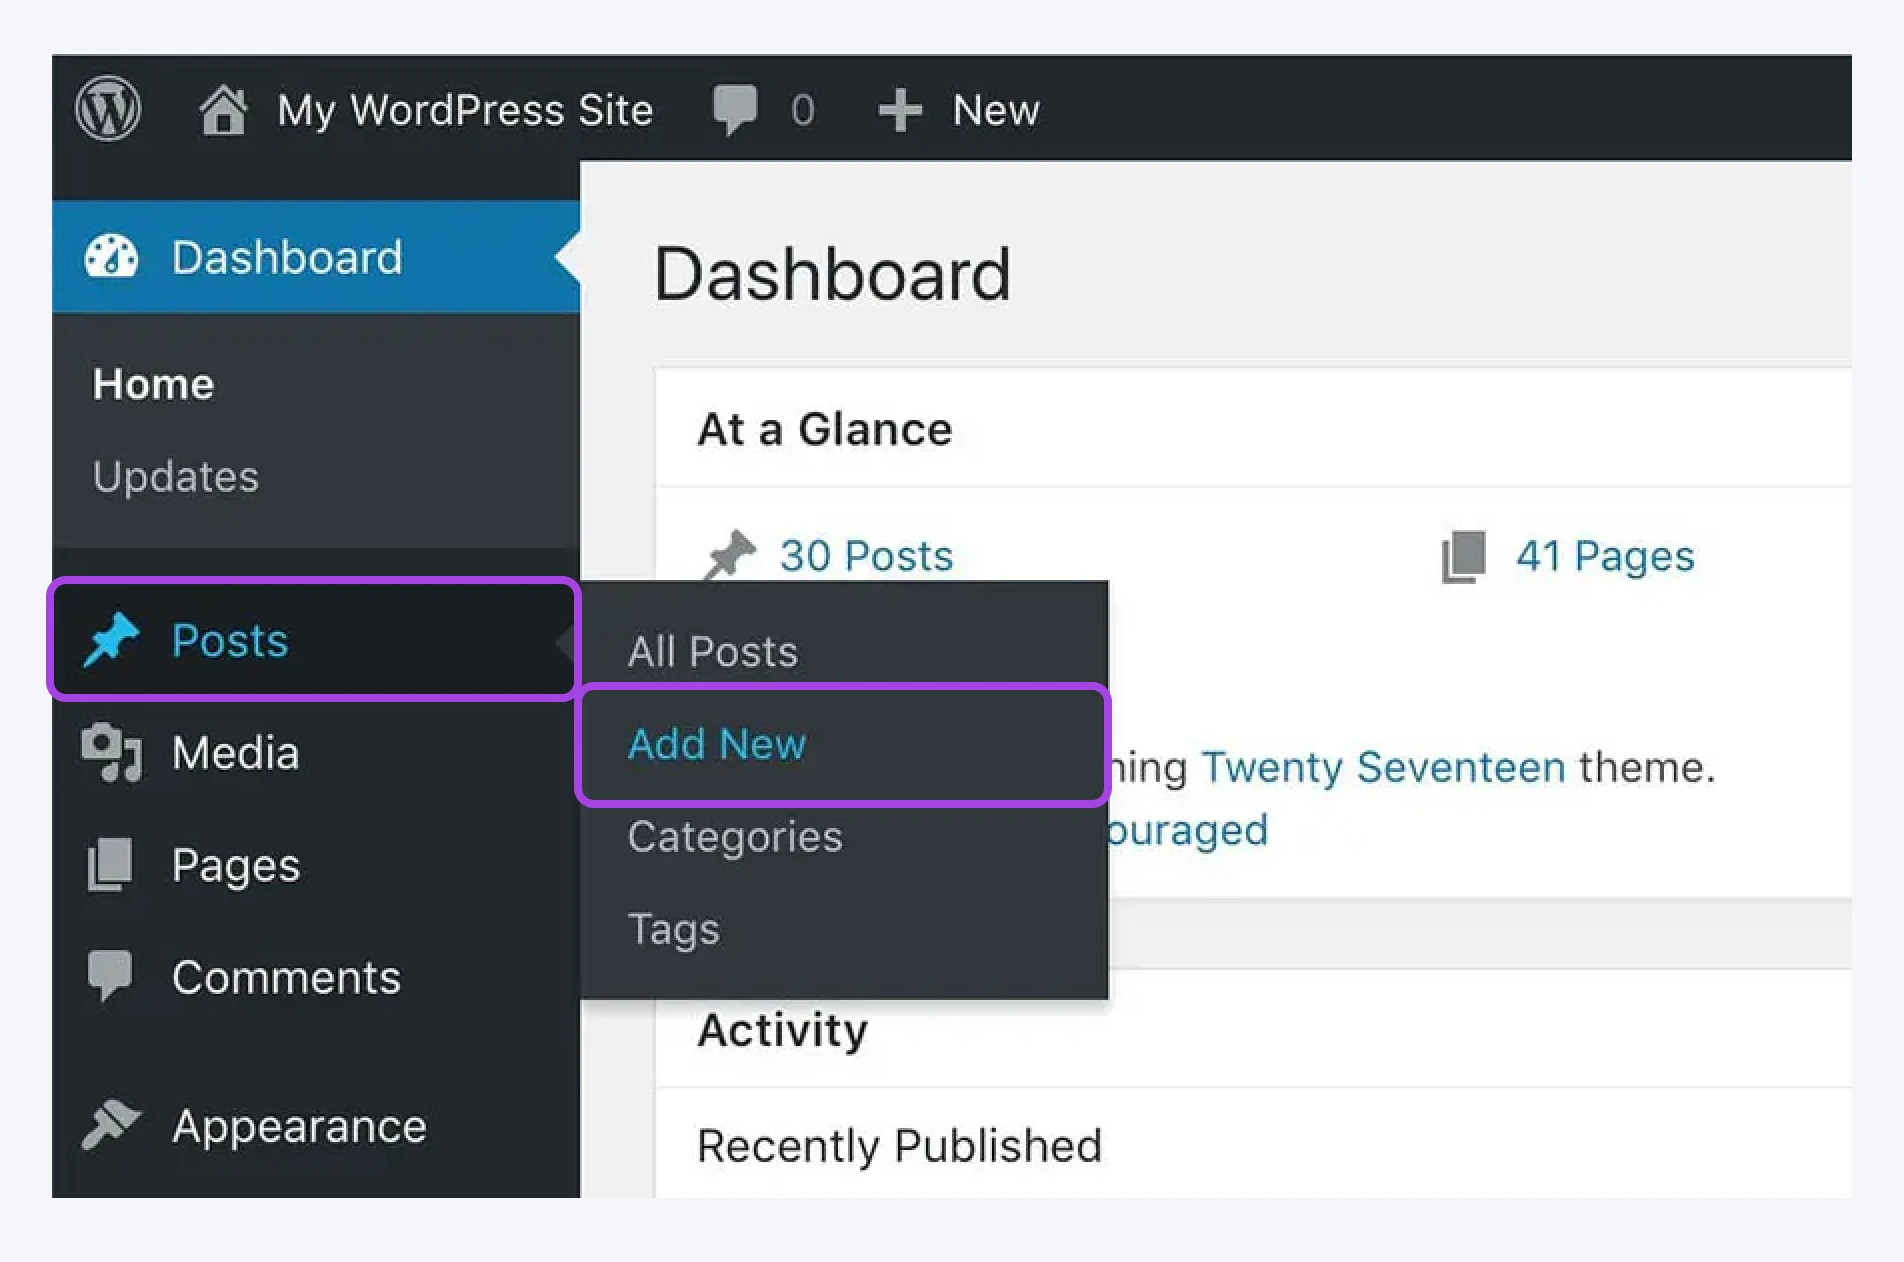
To get started, access your admin dashboard and click on Posts > Add New:
This opens the WordPress editor:
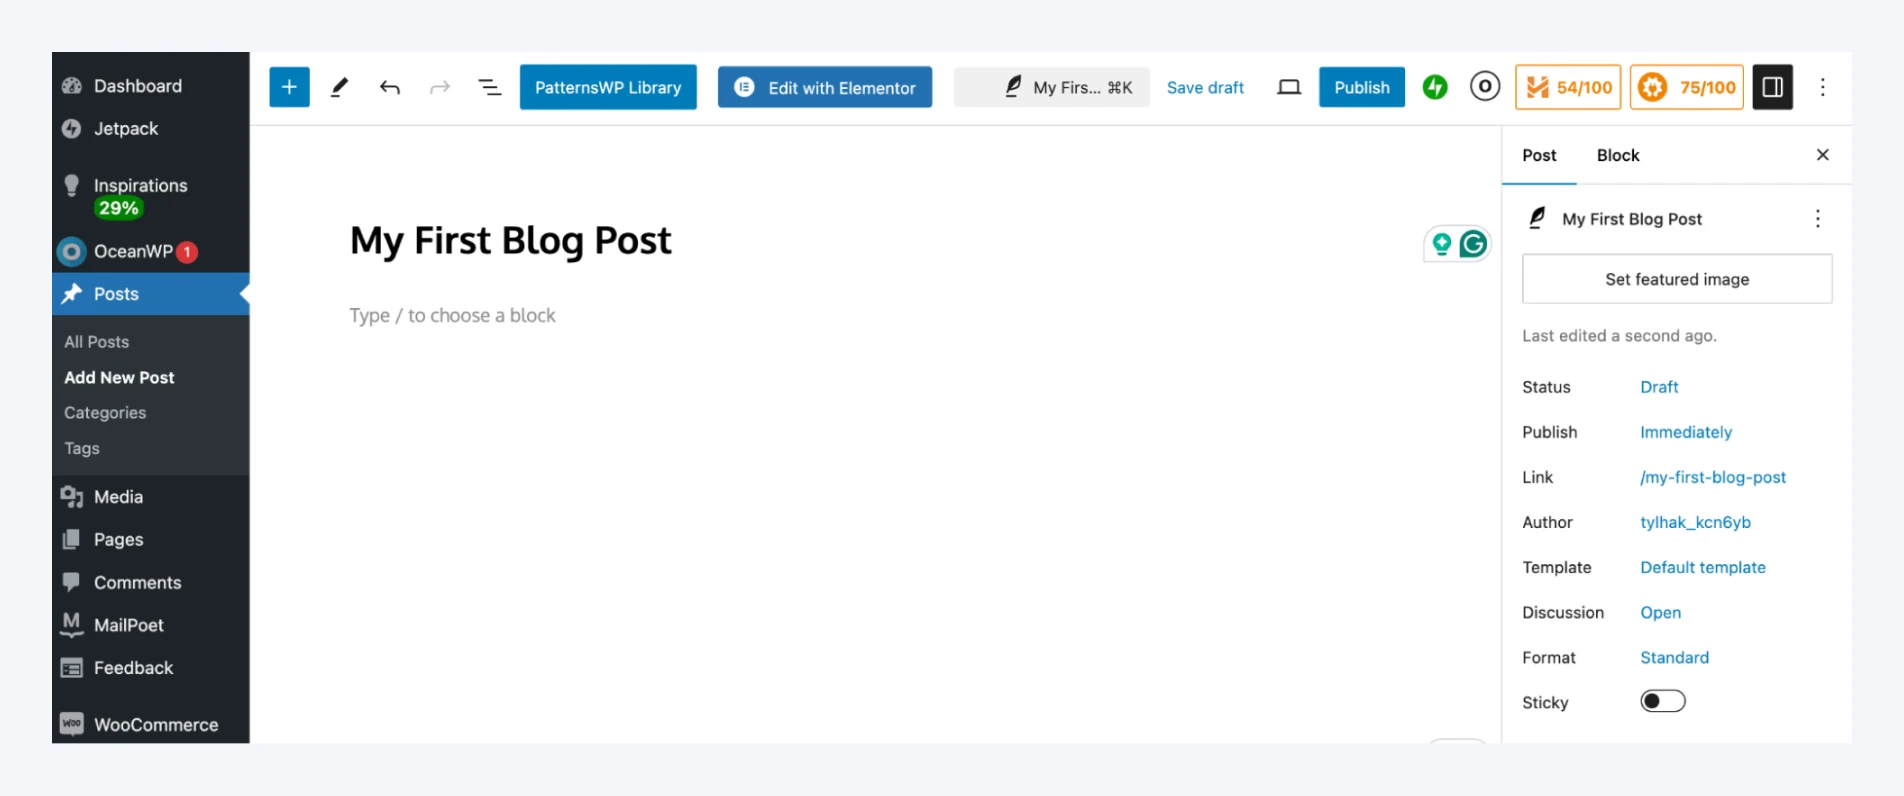
Here, you can start putting together your content. You can write directly within the CMS or copy-paste it from Google Docs or Word.
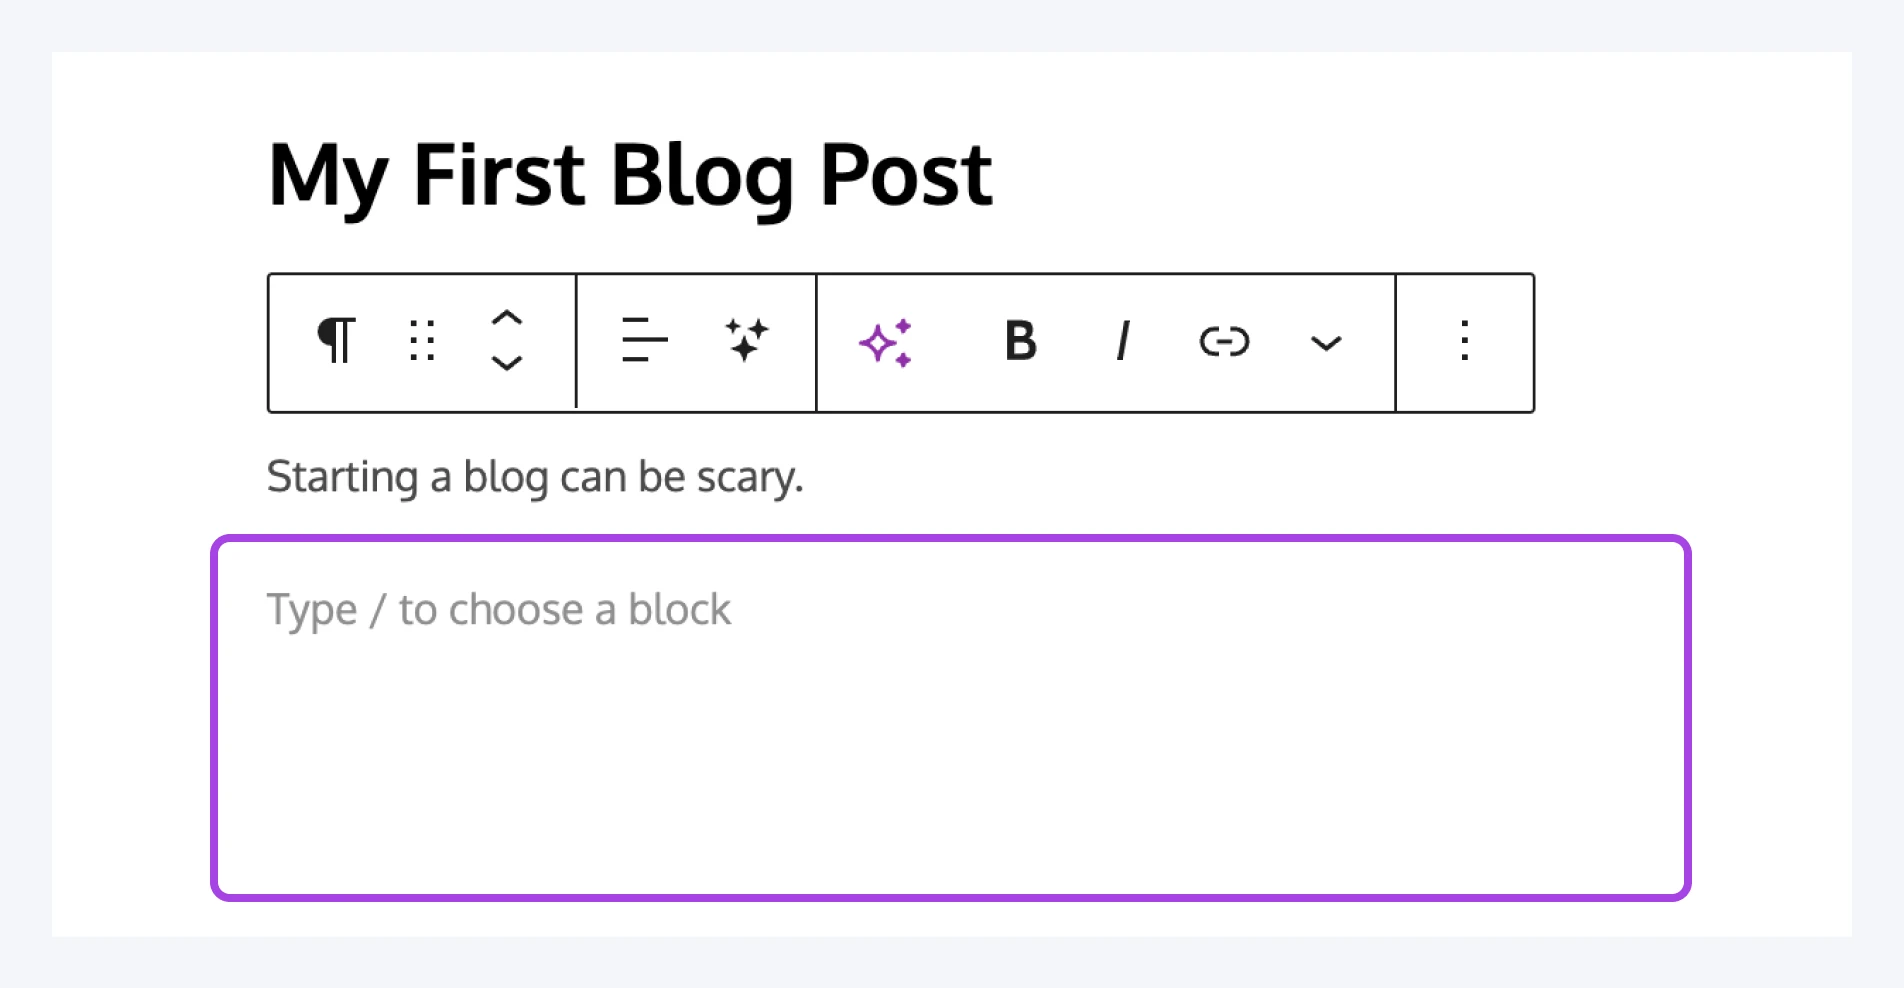
Next, you can type in or paste your body text by typing in the main paragraph block:
Once you have text on the page, you’ll find several options in the right-hand sidebar:
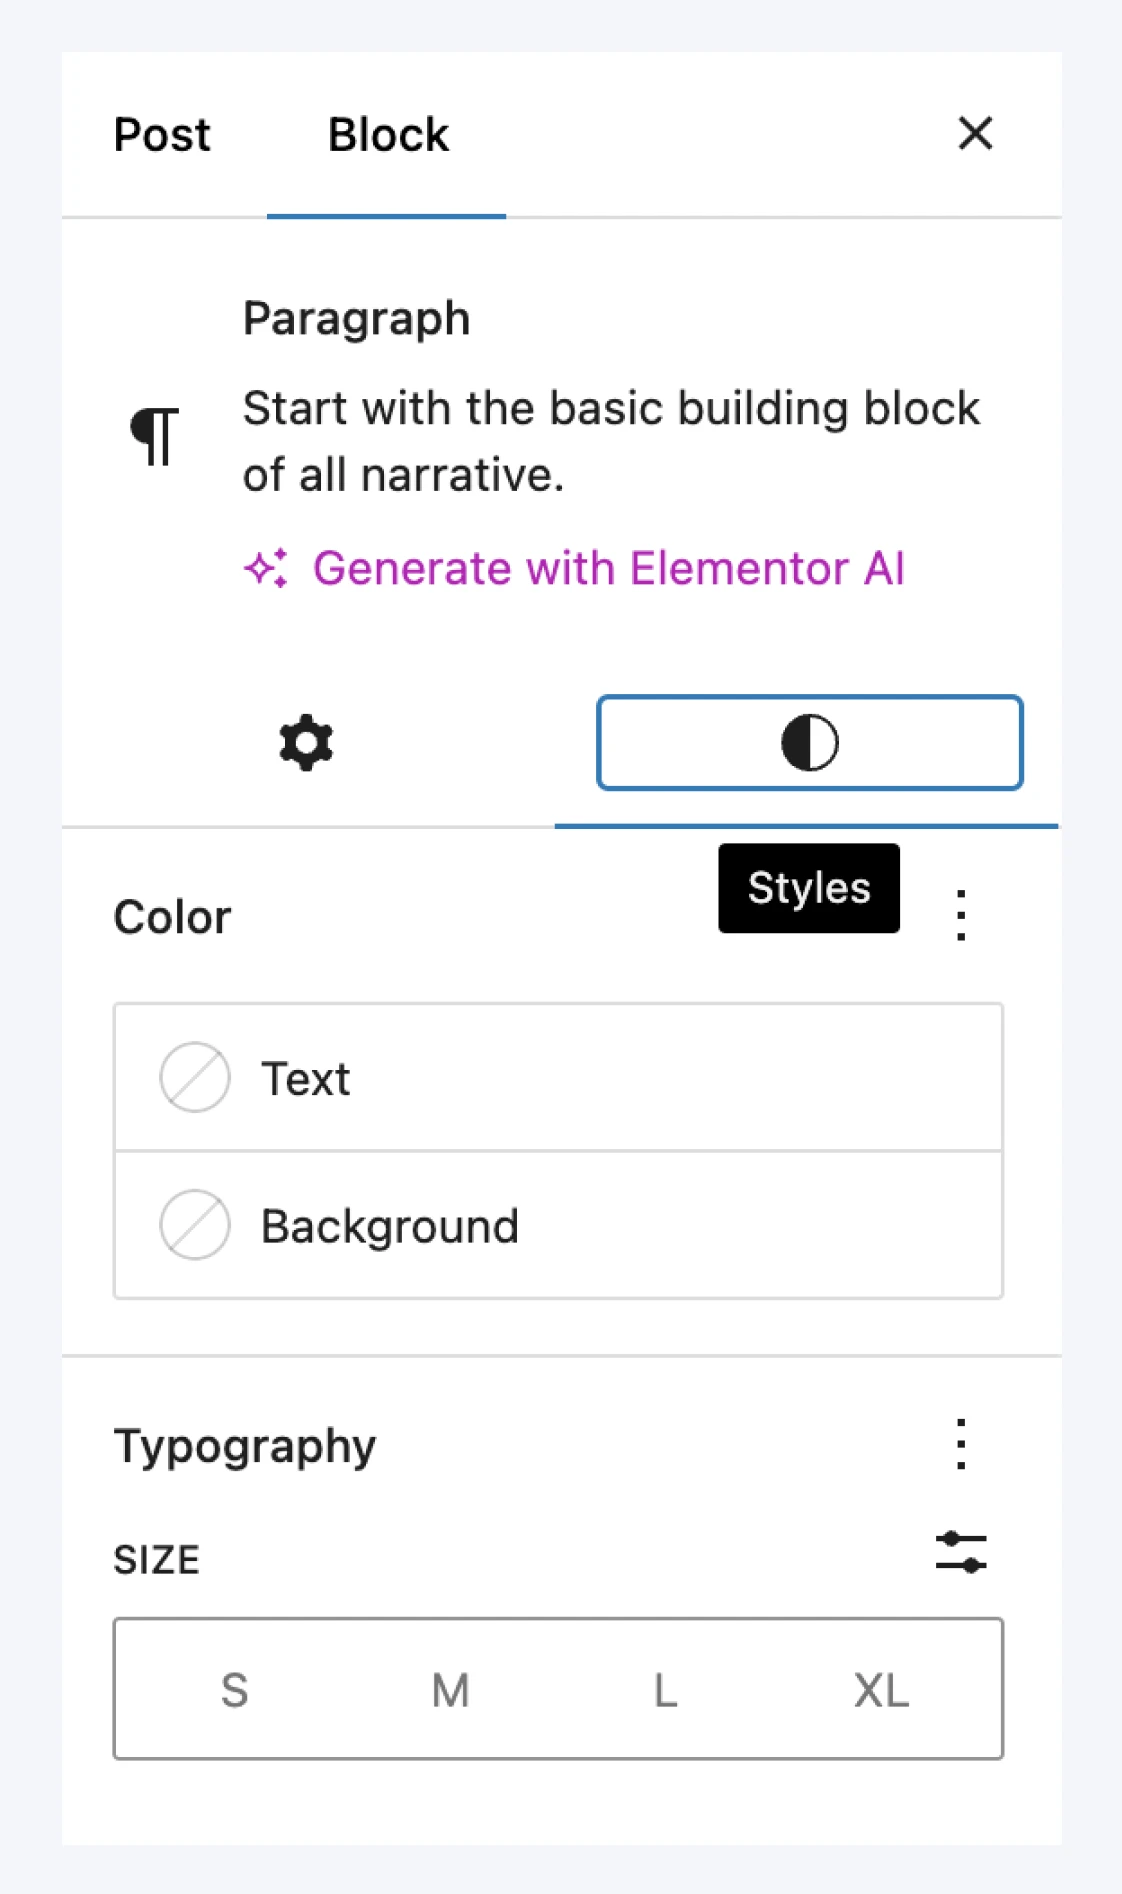
These settings will differ depending on the type of content you’re creating. You can add images and other media to your post by placing a dedicated block into the editor:
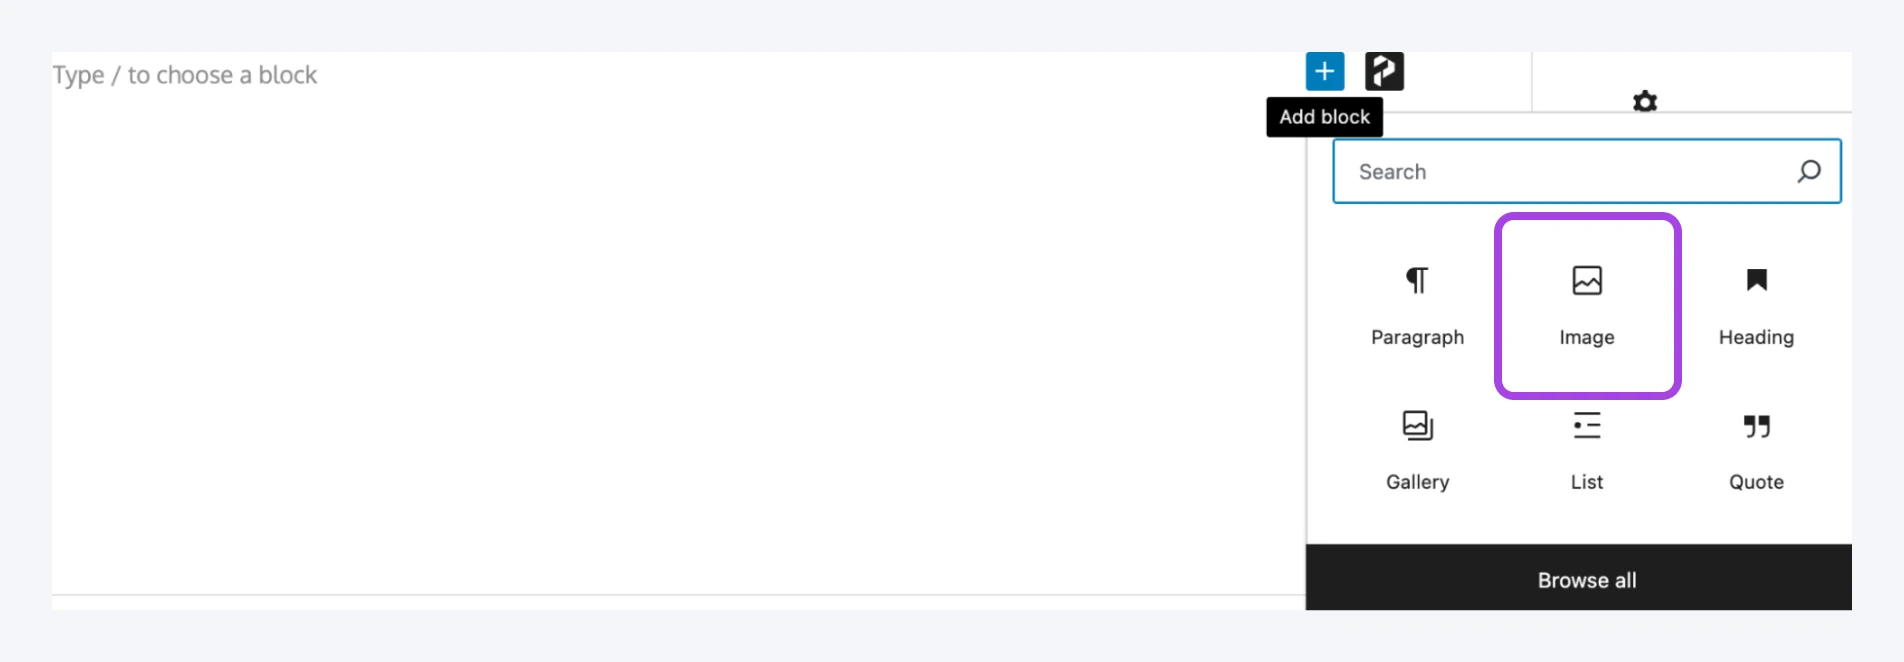
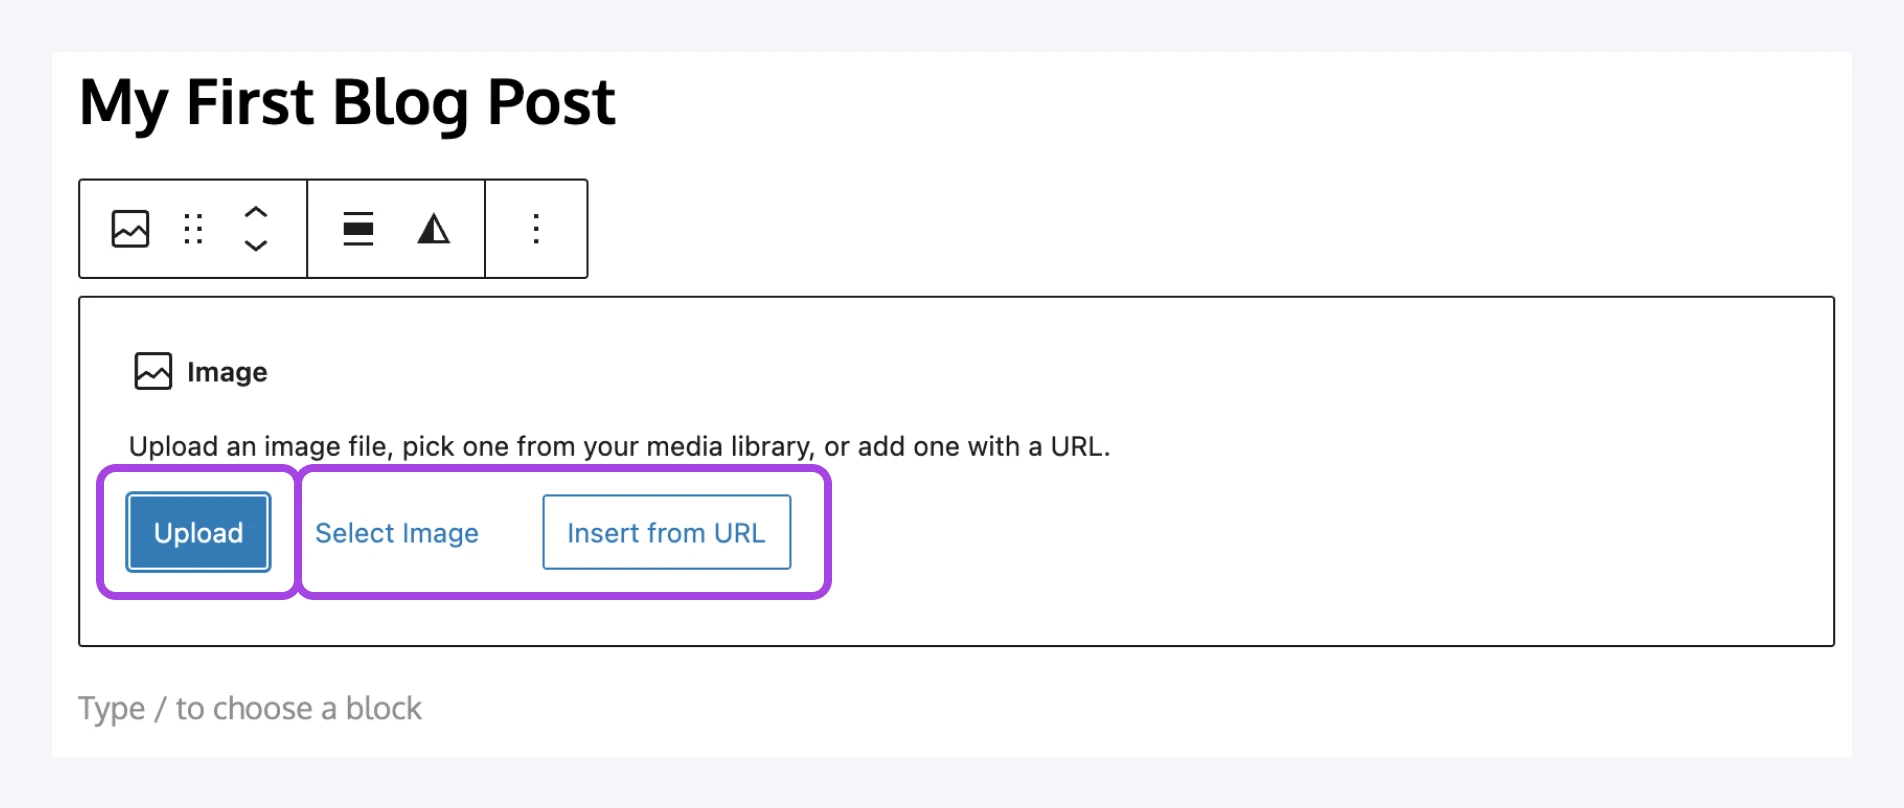
For example, selecting an Image block will let you upload a new image file or choose an existing one from your Media Library:
When you’ve completed your post, you can add the finishing touches. Consider assigning it one or more categories and tags. These help you organize each post based on its type and topic.
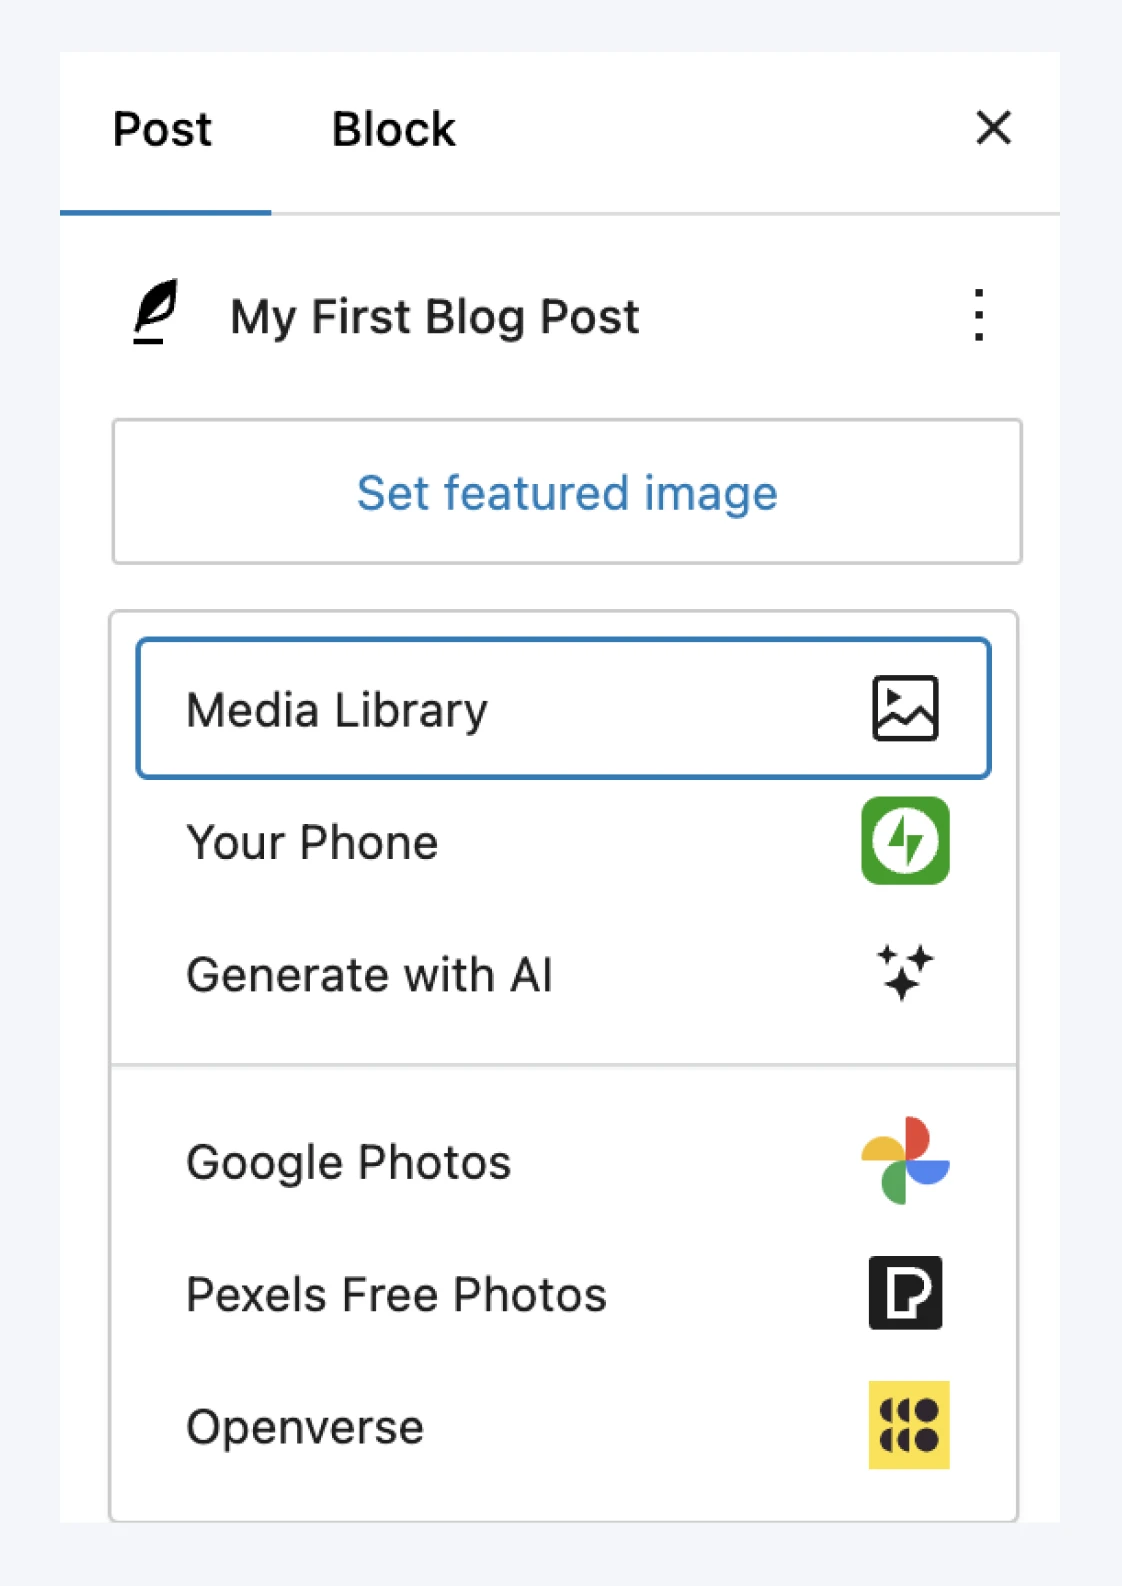
Finally, you can set a featured image for the post. The format of this image depends on your theme, but it’s usually featured on your blog’s homepage and at the top of the post. Select your headline and use the Featured Image option in the sidebar to choose a file:
Salut, dear friend! Your brand new blog post is ready to fly the coop. Go ahead and click on the Publish button in the top-right corner to make it go live:
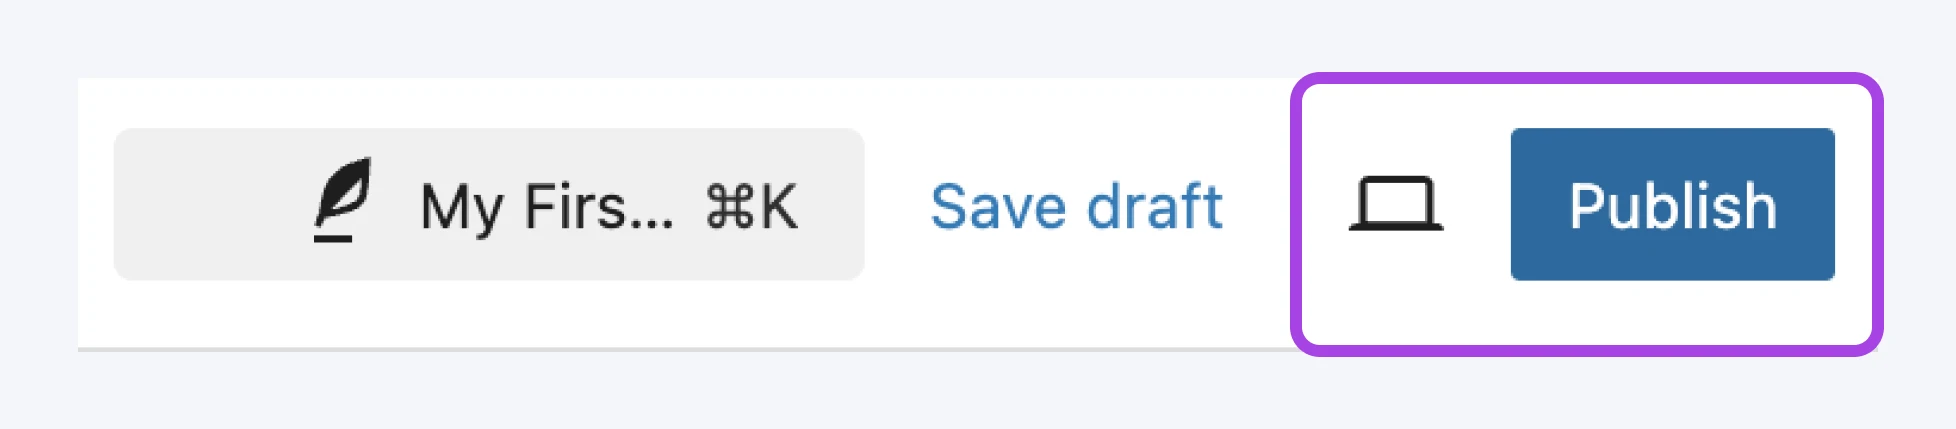
If you’d like to change how and when the post appears on your site, you can opt to delay its publication. You can also select the post visibility, which determines who can see it, or you can simply save it as a draft if you want to continue working on it later.
11. Promote Your Blog
You’ve designed your blog and created stellar content. Now, it’s time to shout it from the rooftops. You’re ready to start making money from your blog.
- Share your posts on social media: This helps you gain more exposure while encouraging those in your network to share your content with their own followers.
- Make your posts easy to share right from your website: One way to do this is by adding social media buttons to your posts, which you can do using the Jetpack plugin:
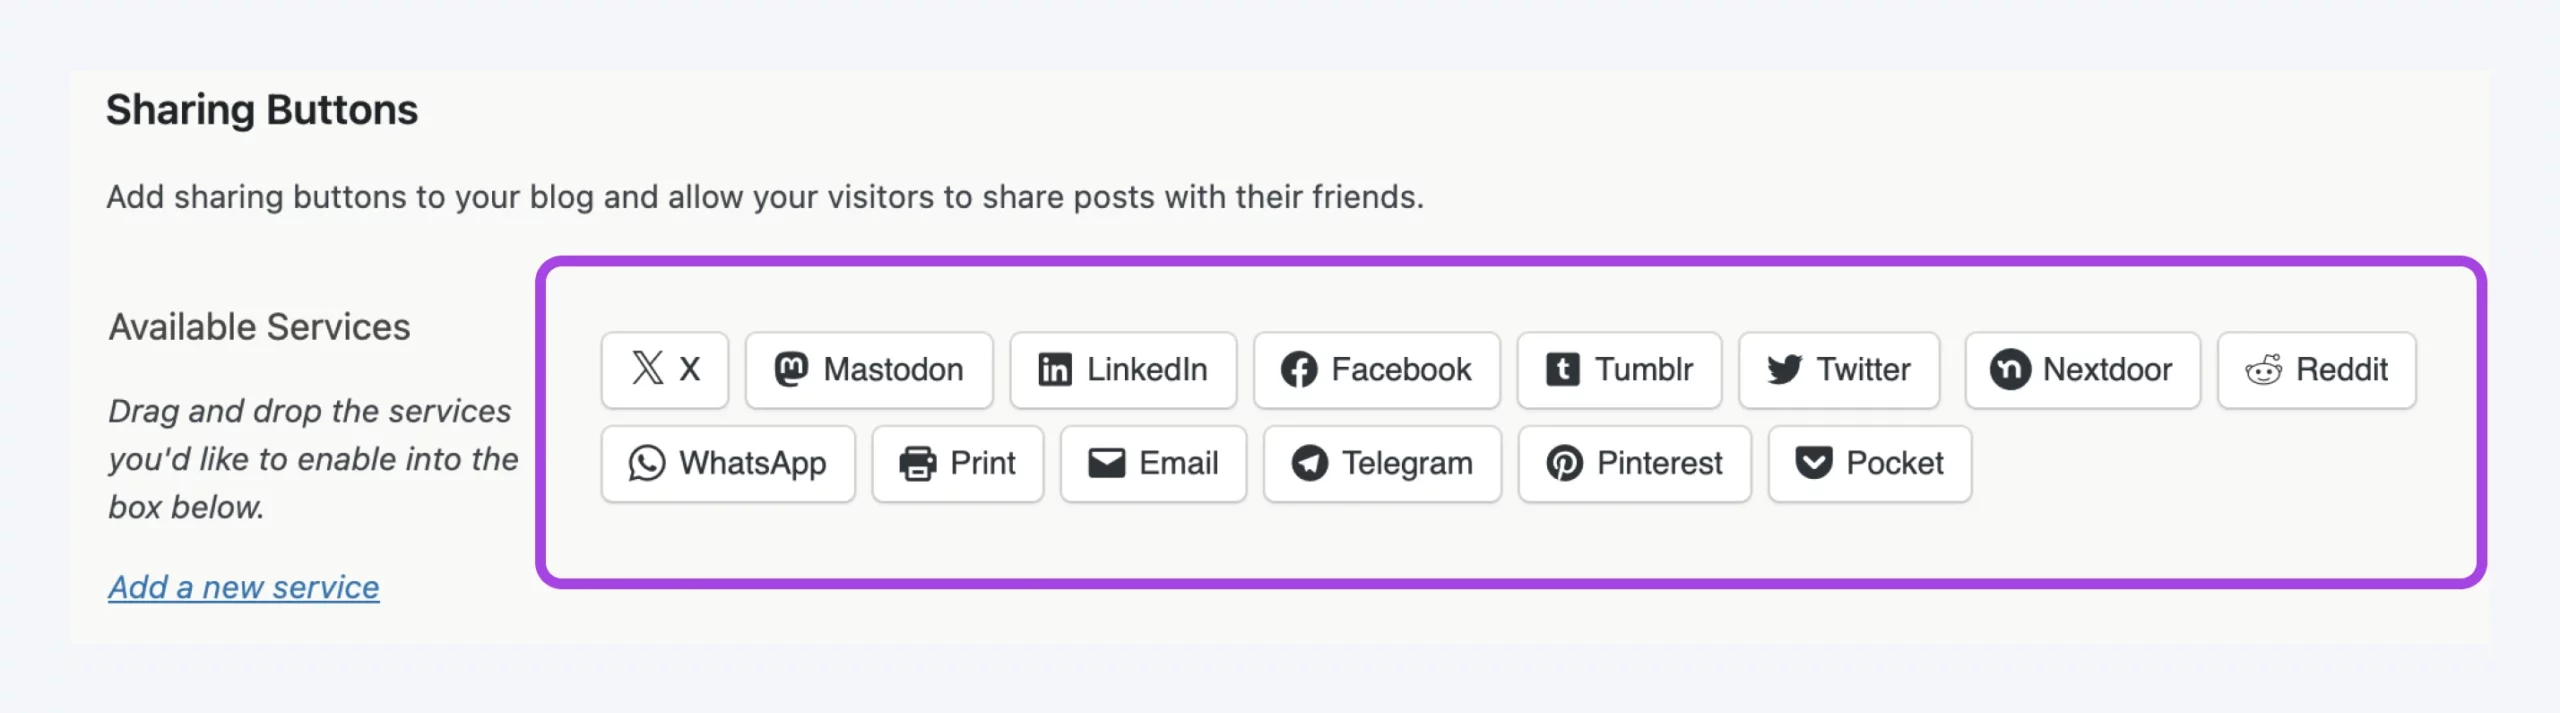
The plugin allows you to add social media sharing buttons to your posts and integrate with the most popular platforms. Jetpack also lets you automatically share your posts on social media.
- Share your blog posts in relevant forums or groups: This can help you generate more traffic and engagement.
- Partner with other websites in your niche: If you have the opportunity to guest blog on another site, you can promote your blog posts there as well, which can help you reach a new audience.
Your Blogging Journey FAQs
Can I start a blog for free?
Building a successful blog is possible for everyone, regardless of their age, location, or experience. You can earn an income online by starting your own blog. It’s one of the easiest, most accessible ways to do so. Turn your passion into a profitable side hustle with virtually no formal qualifications or steep investments. You’ll have to shell out for a web hosting platform, but it’ll pay for itself in the long run.
What if I can’t decide on a blog name or topic?
Stumped on a blog name or niche? No problem! Dive in headfirst. Often, clarity comes from action, not endless planning. Choosing a focused niche can boost your earning potential, but you can blog about anything. So, pick a topic, start writing, and let your blog grow as you do.
Is it possible to start a blog without any technical knowledge?
Today, anyone can create a blog. And by anyone, we mean even your five-year-old nephew. You don’t need to be an expert at coding or design. You can set up your blog easily with user-friendly platforms and comprehensive guides like this one.
Can you still make money blogging in 2024?
Yes! You can make money as a blogger in 2024. Some people make a full-time living from it. So, how can you monetize a blog? Some generate their income through ads, affiliate marketing, and selling products, earning an average of $45,000 a year.
From sponsored content to creating and selling online courses or digital products, you can further monetize your blog, including launching a podcast to diversify your income stream.
Start a WordPress Blog Today
Your new blog is just a few clicks away from becoming a reality. Let your inner writer out, share your passions, and start building your online space. Remember that every great blog started with just one post.
Ready to start a WordPress blog? We recommend checking out our shared WordPress hosting plans. They’re affordable options for first-time bloggers. If you want something more powerful, take a look at DreamPress: our managed WordPress hosting service.
Your blogging journey begins today.
We Support Your Dream
Whatever your online goals, we’ll be right there with you, making sure your site is fast, secure, and always up.
See More